Mood for 2019

mood board 2019Mood for 2019! Here we go. I thought I would share  Midwest Cut Flowers “mood for 2019” I am so excited for this color scheme this year. I asked Erica to send me some ideas and the color swatch below  was the first thing she sent. Yes! I loved it. Natural, simple and a little moody.

Mood Board 2019


2019 color palette
photo source seeds

Here is Seed Design where she found the inspiration. Check them out. Defiantly going to keep them in mind for branding updates here at Midwest Cut Flowers.

Mood in the house

As I have been looking around me in stores,online and in magazines, I totally feel the nostalgia….90″s colors are everywhere. I did not really think about “green” or “bright bold colors”  as being “in”. Actually, I didn’t really think much about it until I felt myself being drawn to the colors.

I have seen navy blue! I have always loved navy blue. Paired with white Navy blue completes a classic look.  I used to have a ton of navy blue….navy blue dishes, dish towels, clothes etc….love that I see it again.

Bowls from Crate and Barrel.

Chair from Target

Another Target find

Anthropologie kitchen towel. Not quite navy but…love it.

The “hunter green” of the 90’s is back too….well its not called “hunter green” maybe you will see it as emerald green, or dark green but I see a flashback to hunter green.  Here is a fun read about 2019 design trends.

Green bench

West Elm Lamp

West Elm vases…

Tons of natural wood tones…love it, love it.

Here is a beautiful wood bowl from Crate and Barrel.

Love these organic live edge wood shelves.

This serving tray from Target.

If you are a thrifter…..goodwill always seems to have some good wood finds.

Mood in floral design

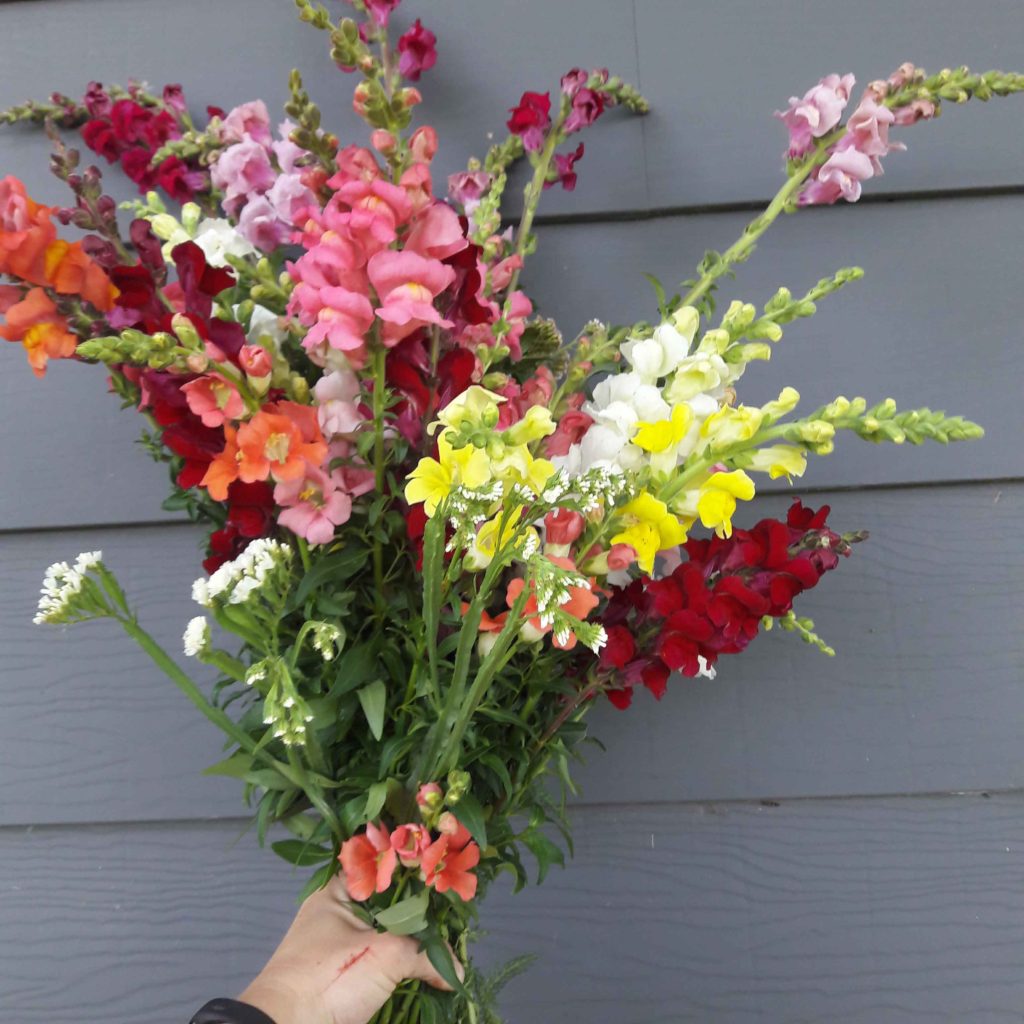
What I see in floral design 2019 is so exciting. There is not a lot of “normal” or “formal”. What I mean by that is, I see a lot of organic life in the designs. Think about walking along the forest floor and all the colors you see. Dark but bold tones. The natural browns of the vines and branches pair perfectly with the bold greens of ferns and other foliage. You can add any other color to this palette and make it work.

Textures are another thing that I love seeing. Dried pods, flowing grasses and small textured flowers like, statice, queen Anne’s lace,celosias and of course seeded eucalyptus. Some of you reading this are probably like “hello, where have you been?” but seriously when you think of a flower arrangement do you think of something like this?


traditional arrangements
photo source: freerange

or….

something a little like this
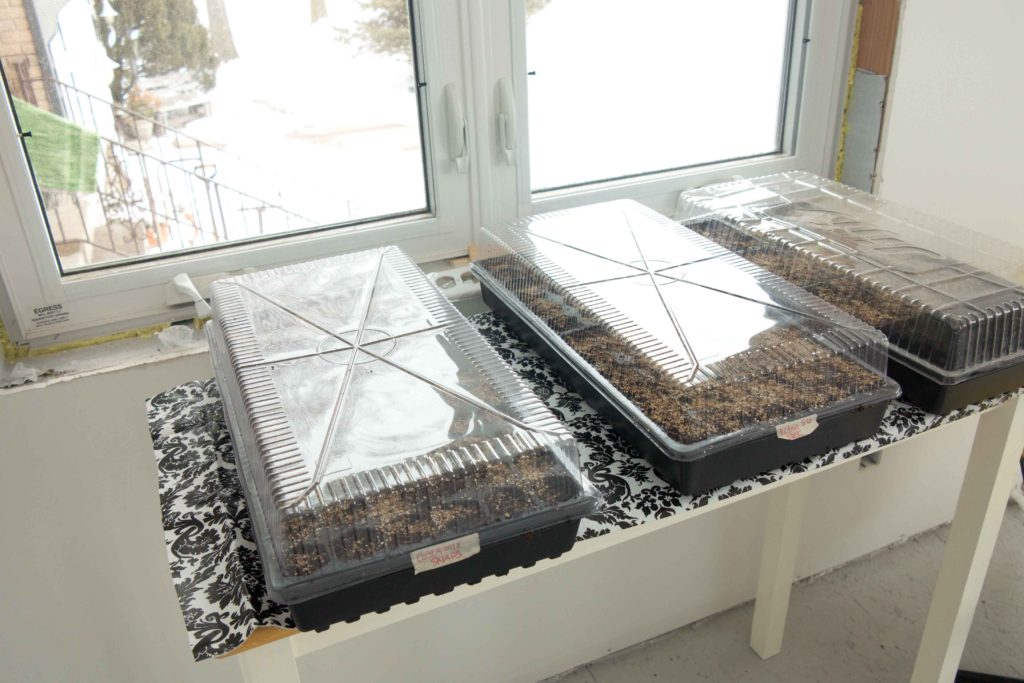
beautiful flower bouquet
photo: freerange

Mood in the field

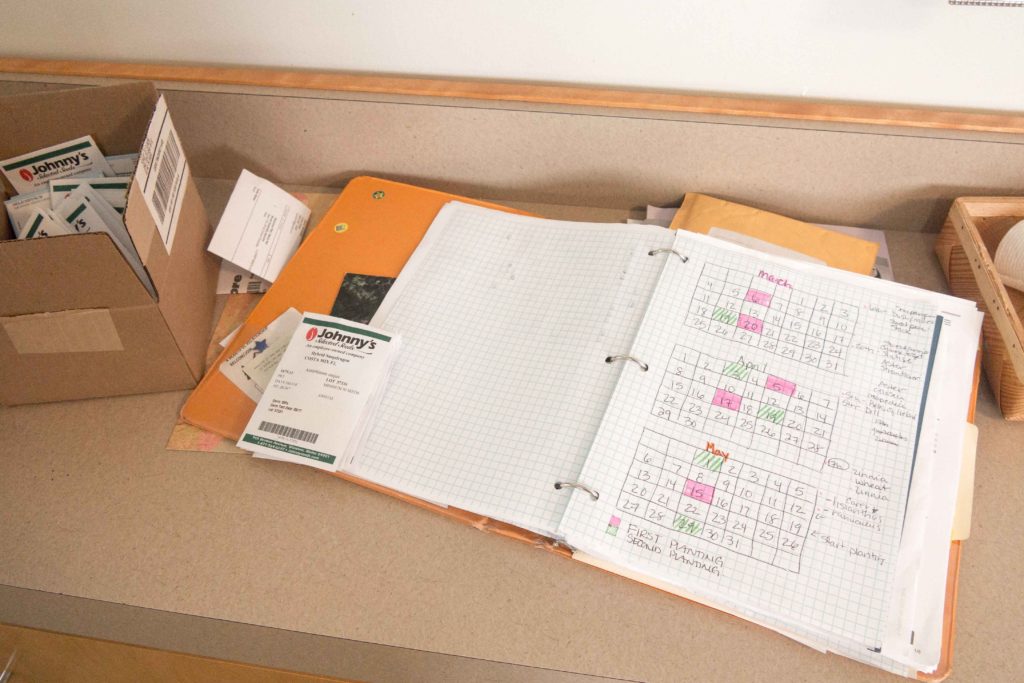
Here are some of the varieties of flowers that I am growing this year that go right along side of our “mood”

white statice
photo source Johnnys selected seeds

This seeker white statice is so gorgeous. It dries incredibly well so it will last so long. I love the green stems with the tiny white flowers. I have had good luck growing this variety.

Silver drop eucalyptus
photo source Johnny’s Selected seeds.

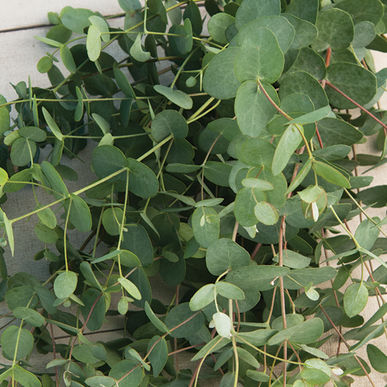
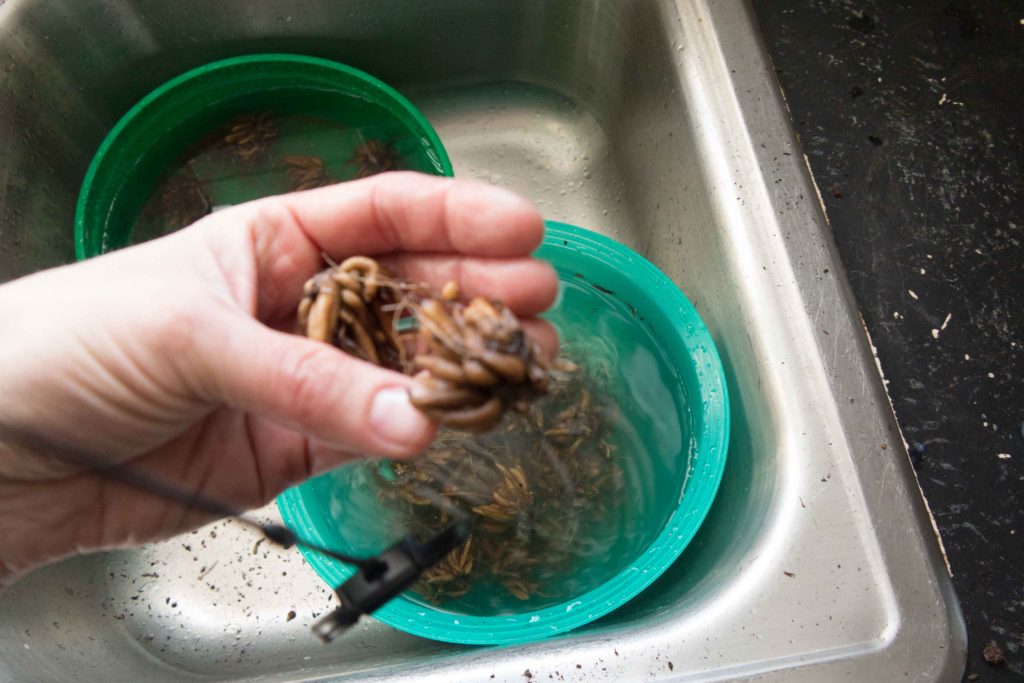
We love the color and texture of this silver drop eucalyptus. I am hoping to dry this also. I think I will need to use glycerin to preserve this instead of air drying.

queen lime orange zinnia
photo source Johnny’s Selected seeds

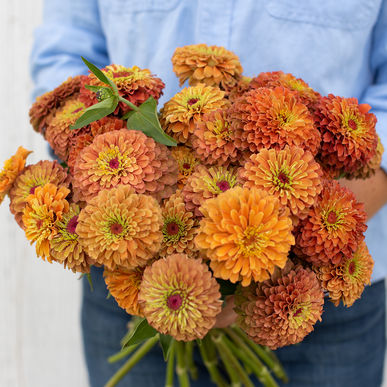
These Queen Lime Orange Zinnias were awesome last year. We are excited to grow them again this year. Zinnias are super easy to grow from seed. They do extremely well direct seeding into the ground. Sow after your last frost. Water and enjoy a season full of cut flowers.

Here is a link to an Easy cut Garden Plan for beginners. It is a guide for you to grow your own cut flowers. We used plants that are super easy to grow. Give it a try.

Don’t want to miss out on what is happening here? Sign up for our email. The only email you get is the new blog post. We love to have you along on this journey. Please feel free to comment! Love hearing from you.

Thanks again for stopping by!

Stop back for more updates and recipes and tips.


Dark Chocolate Saltine Toffee

Dark Chocolate Saltine toffee
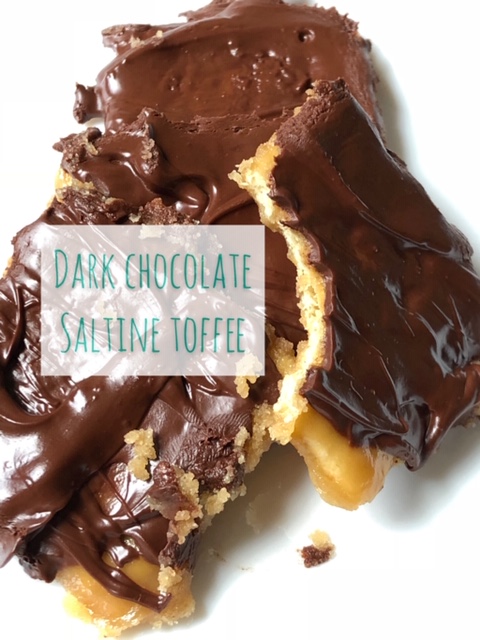
With Valentine’s Day coming up, serve your party guests a treat they won’t forget. These dark chocolate saltine toffee bars are sure to impress guests of all ages! Not only are these bars delicious but they are also so easy to make!

Ingredients:

✔️10 oz. dark chocolate morsels

✔️40 saltine crackers

✔️1 c. Butter

✔️1 c. Brown sugar

Directions:

📎Set Oven to 350° F

📎Line a cookie sheet with parchment paper and lay out saltines 4 crackers by 10 crackers

📎In a sauce pan melt butter and sugar over medium heat. Bring to a boil and while stirring constantly simmer for 4-5 minutes.

📎pour hot toffee over saltines and spread evenly.

📎Bake for 5 minutes

📎Remove from oven and immediately sprinkle dark chocolate morsels over entire pan. Let sit for 5 minutes. Spread chocolate evenly over toffee.

📎Let cool until chocolate is firm.

Brew up your coffee, call your friends, and bite into a dark chocolate saltine toffee bar for a finishing touch to a nice valentines evening.

Dark Chocolate Saltine Toffee

Ingredients

  • 10 oz Dark Chocolate Morsels
  • 40 saltine crackers
  • 1 cup butter
  • 1 cup brown sugar

Instructions

  1. Turn oven to 350 degrees.

    Line a 10" by 15" Cookie sheet with parchment paper. Lay out the crackers in 10 rows of 4.

    In a small sauce pan add the butter and brown sugar. Melt over medium heat. Stir the mixture often. Bring to a boil and let boil for 4-5 minutes. 

    Gently pour over the crackers and lightly spread.  Bake for 5 min.

    Remove from oven and sprinkle with the dark chocolate chips.

    Spread evenly over toffee.

    Cool

Buying your loved one chocolates for Valentines Day is nice…..but baking them something is awesome. My husband totally appreciates the time and effort it takes to make him something special. These dark chocolate saltine toffee bars would be perfect.

What are your Valentines day traditions?

Do you love Valentines Day or not?

I think a lot of people do not like the pressure of Valentine’s Day. I am on the fence. If I think about it….maybe it is overrated.

Don’t forget to sign up for our email…weekly posts coming up…we would love for you to stay in the loop.

This Peanut Butter Oreo Pie would also be a winner…and of course flowers!!! Here is a link to “why you should give your mom flowers” but it can also be used for Valentine’s Day.


Easy Thanksgiving Centerpiece

easy thanksgiving centerpiece
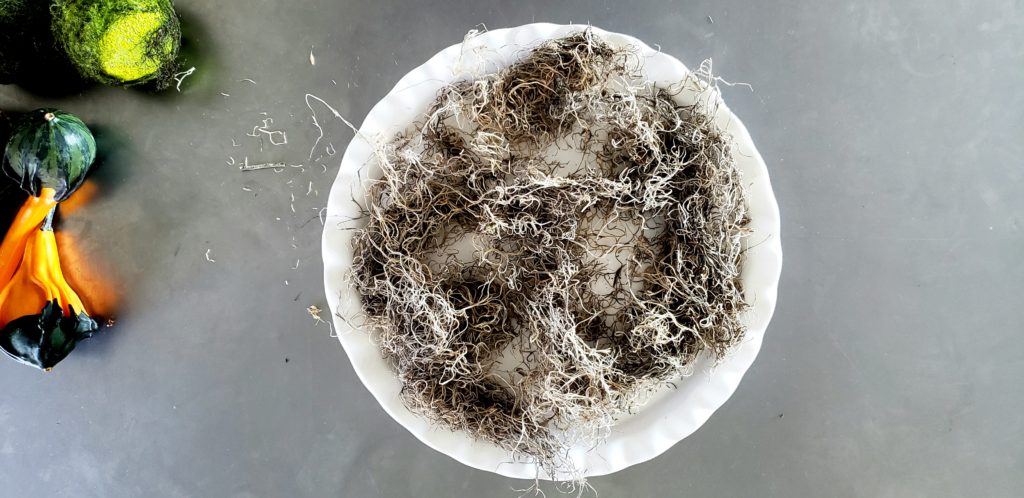
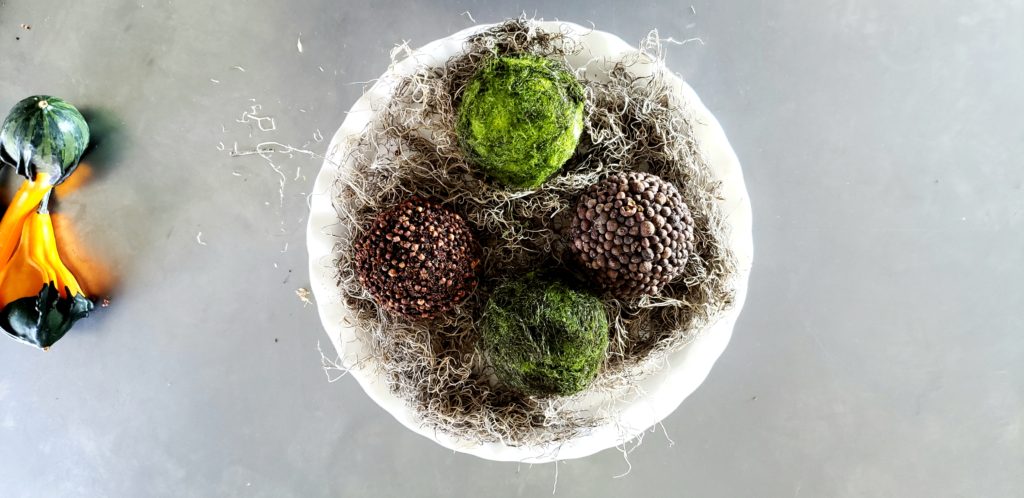
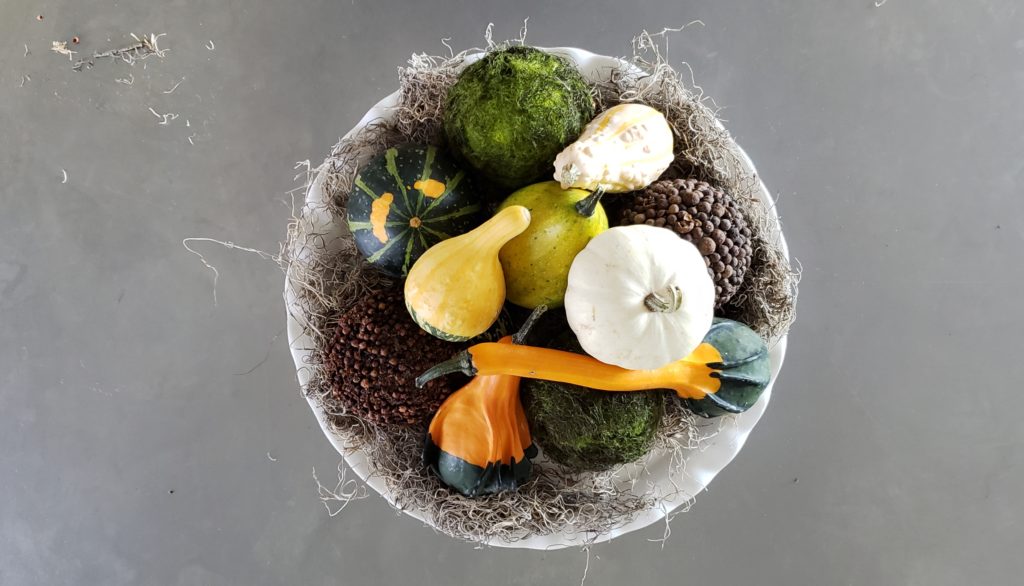
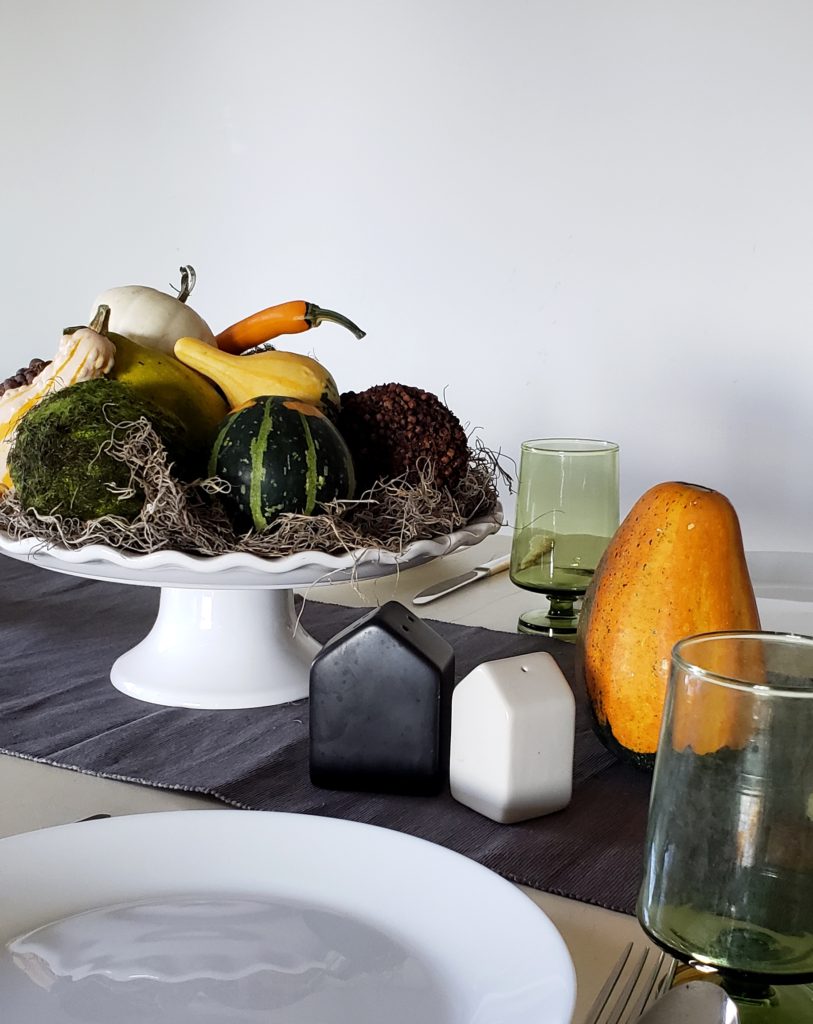
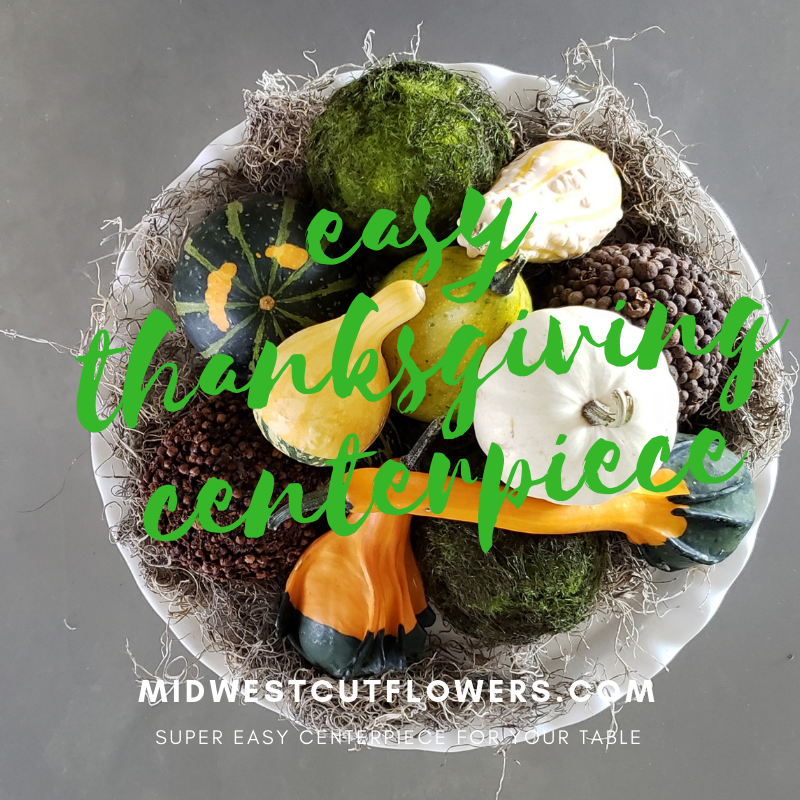
Hey, hey! Turkey day is almost here. This year we are hosting the big shindig. I thought I would share an easy Thanksgiving centerpiece with you. I am all for simple, simple, simple. I don’t do well with to many things and pieces….how I manage everyday life is quite a mystery! Anywho….back to the easy thanksgiving centerpiece.

I do not like really large centerpieces where you can’t see the person you are across from. Of course this works pretty good with bickering teenagers…. I prefer to keep the centerpieces low.

thanksgiving center piece supplies

Like most of my DIY’s, I encourage you to use your imagination. You can use this as a guide… if you do not have everything that is called for…use something else.

Supplies for the easy thanksgiving centerpiece:

  • cake platter or pedestal bowl
  • Spanish moss
  • moss balls ( found at craft stores)
  • textures balls (I made mine but found at craft stores)
  • small gourds
  • table runner

spanish moss base

Place the Spanish moss onto your base. Spread it around until you are happy with the amount.

spanish moss


With your fingers, make small openings in the moss where you will set your first 4 items. This will help hold the balls in place.

moss balls

Put your moss and textured balls into the indents you have created. This will be your base of the arrangement.

gourds in centerpiece

Take your gourds and put them around and on top of the balls. You can add as many or few as you would like. Also if you want, you can place any extra gourds on the table runner next to the centerpiece.

thanksgiving centerpiece

I found the Spanish moss at Jo-Ann Fabrics.

My cake platter came from Target

The moss balls can be found at Michael’s

Here are some textured balls

and a cute grey table runner.

Gourds can be found at any grocery store.

These links are not affiliated.

What do you like to put on your table at Thanksgiving?

Check out this easy DIY holiday project.  These cards will be the finishing touch for your gifts this year.


Blissful Canadian Butter Tarts

Canadian butter tarts
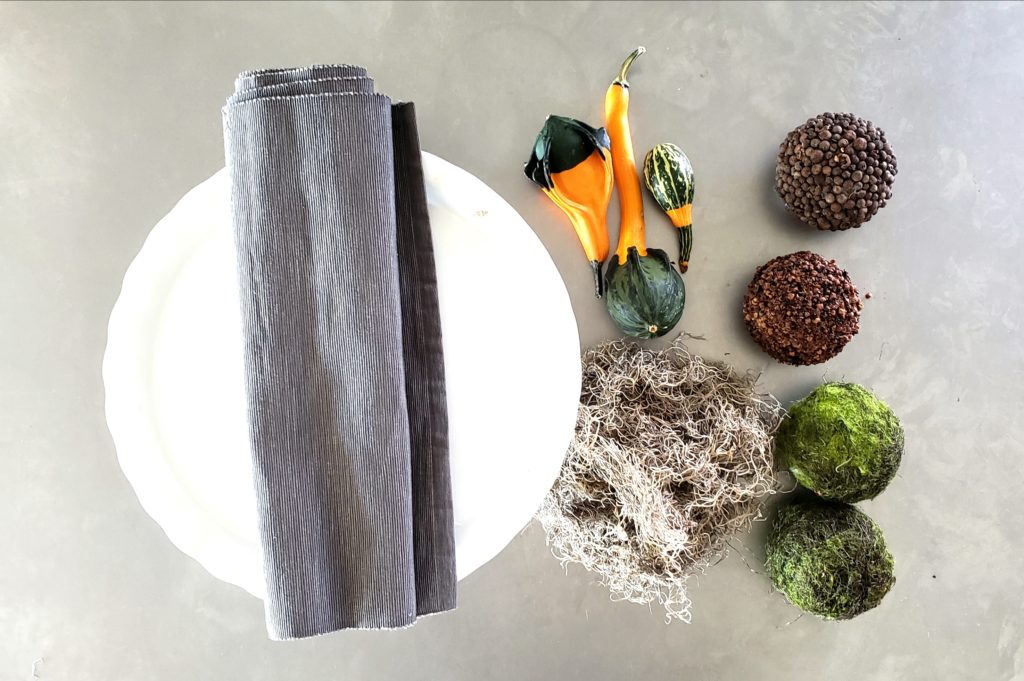
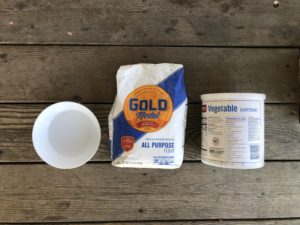
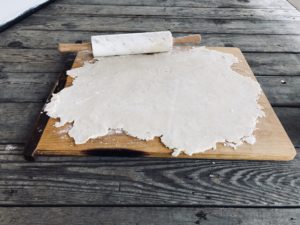
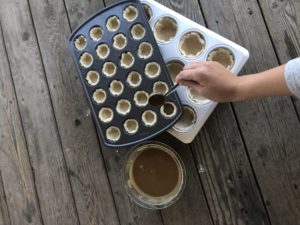
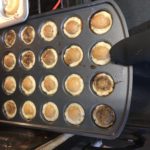
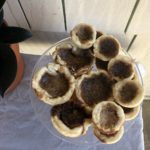
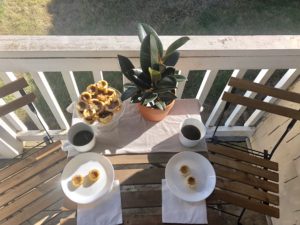
It’s that time of year when my thoughts turn to how fast summertime went and all the while trying to enjoy this beautiful fall weather. Baking traditional Canadian desserts is one of my families “must haves” at this time of year. Butter tarts first came to Canada in the early 1900’s from France. Growing up in Canada, we had butter tarts every holiday season, with some for special occasions throughout the year.

Directions and pictures

To make butter tarts you will need a mini or regular muffin tin, two mixing bowls, a whisk, a fork, measuring cups, measuring spoons, and a rolling pin.

Filling

The ingredients you will need for the filling are ½ cup of brown sugar, two tablespoons of vanilla (intimidation vanilla works), ¼ cup of butter, and two eggs. 

Crust

½ pound or 1 ⅛ cup of shortening (butter or lard will work also), two cups of all purpose flour, and ½ cup of water is need for the crust of the butter tart.

Preheat oven to 350 degrees.

Mix together brown sugar, butter, eggs, and vanilla until butter chunks are gone and brown sugar is dissolved, to make a foamy filling. Set aside.


In a separate bowl combine flour and shortening with a fork or pastry blender until contents becomes a crumbly mixture.

Add water and mix until mixture becomes a soft dough.

Get surface ready to roll out dough by dusting with flour.

Roll out dough until it is about ⅛ inch thick.

Using the edge of a ⅓ cup for mini tarts and the edge of a 1 cup for larger tart cut out circles of dough and place into muffin tins.

With muffin tins prepared, use a tablespoon scoop 1 tbsp. of filling into the mini tarts and 2-2 ½ tbsp into the regular tarts.


Once all tarts are filled with the filling, place into oven for 15-20 minutes or until the filling starts to bubble.

Let tarts cool for ten minutes before removing from the muffin tins and cooling completely on a cooling rack.

Blissful Canadian Butter Tarts

These melt in your mouth butter tarts will be a family favorite.

Course Dessert
Prep Time 20 minutes

Ingredients

  • 1/2 cup brown sugar
  • 2 tbsp vanilla
  • 1/2 cup soft butter
  • 2 large eggs room temperature
  • 1/2 pound shortening lard or butter
  • 2 cups all purpose flour
  • 1/2 cup cold water

Instructions

  1. In a medium mixing bowl add the brown sugar, vanilla, soft butter and eggs. Mix until well blended. Set aside

  2. In another bowl add the flour and the shorting. Mix with a pastry blender or fork until the mixture resembles small peas. 

    Slowly add the cold water and gently mix until combined.

    Roll out on floured surface until dough is 1/8" thick

    Using the edge of a ⅓ cup for mini tarts and the edge of a 1 cup for larger tart cut out circles of dough and place into muffin tins.

    With muffin tins prepared, use a tablespoon scoop 1 tbsp. of filling into the mini tarts and 2-2 ½ tbsp into the regular tarts.

    Once all tarts are filled with the filling, place into oven for 15-20 minutes or until the filling starts to bubble.

    Let tarts cool for ten minutes before removing from the muffin tins and cooling completely on a cooling rack.

The best way to serve a butter tart is with a warm cup of coffee, and a room full of family and friends. If you enjoy getting new recipes, reading gardening tips and tricks, and following my journey as a small flower farmer, subscribe to my blog midwestcutflowers.com and follow me on pinterest and instagram. Try not to FALL for this amazing treat, they are sure the LEAF you smiling! 

Crazy summer

strawflower in bloom
strawflower

So I am not sure what happened to the posting once a week thing…. but any who here I am. This summer has been crazy. Has yours seemed busier then normal? The flowers have been doing great. It has been a blast planting new varieties and seeing what they do. As like last year. Next year I need to double again. It takes a lot of blooms to make a decent sized bouquet. I also need to plant more foliage.

heirloom pumpkin
heirloom pumpkin
pumpkin
heirloom pumpkin


celosia
celosia
dahlia
sweet William dahlia
dahlia blooming
dahlia

When I went out this morning to cut….I wore a sweatshirt. It felt amazing…but I am not ready to let our summer go just yet. I am still hoping for a few more hot days. How about you? Hot days or sweatshirt weather?

A quick hello

Hey it’s me popping in for a quick hello. “Hello” I am just going to give you a quick update on what is happening here…..a lot. Remind me not to make any appointments in the month of May or June!! It is way to crazy to try and keep up on the outside stuff and be responsible and take care of “my real job”.

Flower stand and flower bike
My flower stand

I am going to try and post an update or a recipe once a week (ha) during the summer. The updates will be pictures of what I am doing with the flowers and a quick blurb.

Bunch of stock flowers
Stock

Also if you want to know what I am dreaming of pop over to pinterest and follow my board…..dreaming I know but who knows. I might get to a few of these wonderful ideas.

fresh cut flower bouquet
bunch of flowers

This is year 2 doing the flowers and my flower stand. Things are picking up. I planted double the blooms as last year and for next year I have to double that. It takes a lot of blooms for one bouquet.

On the agenda

So there are a lot of things on the agenda.

  1. I am working on a recipe post for a super yummy fruit pizza.
  2.  I am trying to clean out my raspberry patch because the weeds have gone crazy.
  3. Putting together plans for a hoop house.
  4. Pulling up grass along the fence and planting perennials for cutting
  5. Trying to fit all this in among laundry, kids, cleaning, appointments, sleep, exercise (what is that anyhow

A few things I am loving

  1. Linen has had my attention for awhile this dress. Lovely!
  2. Cold coffee…. my dad would never….this cold press from caribou is fab!
  3. Waxed canvas bags, this one is a fav.

10 must do garden hacks


garden hacks you must do

If you follow me on pinterest you will see that I have created a garden hack board. I loved these garden hacks and I bet you will too. There are so many cool ideas out there…check them out!

1. Making rowsmarking rows for you garden


source

I absolutely love this rake idea.


2. DIY plant markers

diy plant markers

source

These little plant markers are so cute. I love the organic natural look of them. Super easy to make!

3. DIY soil testing

DIY soil testing

source

I did this soil test last year. It is a pretty interesting thing to try. Would make a great science project!

4. Milk jugs to cover seedlings

milk jug to cover seeds

source

Sometimes those little seedlings just need a little help.

5. Composting for beginners

composting for beginners

source

I love composting. I can get a little nerdy about it….but it does wonders for your soil.

6. Growing potatoes

growing potatoes

source

I attended a garden expo with my sis in law this spring. This was one of the things they talked about in the vege growing class. I am excited to try it. A few years ago I did something similar with tomato cages but this will keep things together a lot better.

7. Improve your soil

improving garden soil

source

If you take the time to amend your soil you will not be disappointed. Even if you just do 1 little thing you will see results.

8. Grow plants from cuttings

grow lavender from cuttings

source

So this can take a bit of time but once you do it you are hooked.

9. How to make cut flowers last longer

how to make cut flowers last longer

source

Love the suggestions.

10. Growing with landscape fabric

growing with landscape fabric

source

I am such a fan of this method!  Highly recommend it. It will make your weed wars so much easier and I think that my plants were way healthier using it. The fabric can be used for years. It is a bit of an investment but worth the money!

Be sure to check out some of my other posts. 12 awesome gardening sites not to miss.

Cheesy beef and bacon soup

cheesy beef and bacon soupThis is cheesy beef and bacon soup is a new family favorite. We loved it so much I wanted to share it with you! Our family is a huge fan of bacon.  Serve it up along side of your favorite salad and it will be one of your go to meals.

I know that soup feels more like a winter meal but it is April and we are still getting snow!! I actually love soup anytime of the year. How about you?

Cheesy beef and bacon soup

Delicious savory flavors of beef and bacon

Course Main Course
Prep Time 15 minutes
Cook Time 20 minutes
Total Time 35 minutes
Servings 8 people
Author Rhonda Bunn

Ingredients

  • 1 lb cooked bacon
  • 6 cups water
  • 6 tsp better than bouillon roasted beef base
  • 1 cup shredded carrots
  • 5 med potatoes cubed
  • 1/2 tsp black pepper
  • 10 slices american cheese

Instructions

  1. In a large pot add the water and the better than beef bouillon beef base. Set temperature to medium.

    Add the shredded carrots, onions, pepper and the cubed potatoes.

    Bring contents to a simmer and simmer until potatoes are soft.

    Approx 10 minutes.

    Remove from heat.

    Add the cheese and stir until melted.

    Add crumbled bacon.

    Serve and enjoy

Recipe Notes

Have vegetables cut and ready to go before starting soup. 

Cheesy beef and bacon soup

Follow up your meal with my lemon blueberry sour cream cake.


Keep an eye peeled for a flower farm update. Next week.

12 awesome Gardening Sites not to miss

12 best gardening sitesThere are many flower sites, seed sites, garden sites, blogs etc on the web.  I thought it would be fun to share 12 of my favorite gardening sites with you. It was not easy to narrow it down to 12.  These are not affiliate links, just my own choices.

Seed and bulb Sites

I have had amazing luck with the seeds from Johhnys seeds. They also have a growers library which is extremely helpful.

Great seeds and dahlia bulbs from Floret.

Amazing selection of Dahlia bulbs from Swan Island Dahlias It was so hard to pick which dahlias that I wanted to grow this year.

Garden hints and tips

I totally enjoy reading facts about plants and landscaping from The renegade gardener.

A wealth of information found here on Daves Garden

This site is also a winner for me.. in your state use the knowledge found at your extension service University of Minnesota Extension Service

Flower Farms

I posted this inspiring site before floret flower farm

Roses…..I would love to do this but just checking out the website is good right now Grace Rose Farm. ( new website launching next week.)

Love following this blooming flower farmer at  Butterbee Farm

and this one Flourish Flower Farm.

Florists and flower design

Florist site Oh flora studio.

Another florist site..Studio Mondine

The reason I love the 2 florist sites posted is that they push the “norm” in flower design. Love it.

I hope you enjoyed my list. Please let me know what your favorite sites are. I would love to check them out.

I posted my flower farming inspirations a few posts back. Check it out if you didn’t get a chance to read it.


Starting flower seeds and ranunculus

starting seeds

The time has come to start flower seeds. I am starting about twice as many seeds this year as I did last year…..as I was doing my seed starting calendar….yes i feel super professional, ha ha, I am thinking….space, I need space to plant all of these babies.

I do have my garden spots for this year planned but I think I might need to do a little shuffling around to fit all the plants in. I plan to squeeze most of the plants a bit closer together then I had them last year.


garden journal
garden planner

Starting seeds indoors

starting seeds

I washed all my seed trays in bleach water to kill any left over bad stuff from last year. These trays worked great for me, but next year I would like a soil block maker.

moist potting soil

The potting soil should be moist, not soaking wet.

seed starting

After I filled the trays I went over all the holes with my fingers and pressed slightly down to pack the soil. I then added more soil to fill the holes. This helps keep the plug firm for transplanting. After adding the seeds according to the directions on the package, I watered from the bottom and put the plastic dome on the trays.

seed trays in windows

Here the seeds are in front of a sunny window. Some seeds like warmer soil so those ones are on a heat mat.

Starting Ranunculus

starting ranunculus combs

Ranunculus flowers are so beautiful. They are an early bloom and do not like hot weather.

ranunculus
ranunculus

I did not grow these pictured here, but am crossing my fingers that I can!

They came looking like tiny dried little octopus. I soaked them in water for 6 hours and then put them in a tray of vermiculite and covered them with potting soil.  Now I am waiting for them to sprout roots so I can plant them. I will keep you posted on the progress.