Well, well those greeting cards are going to start filling your mailboxes before you know it. Nature-stamped holiday cards are fun and easy to create. The best thing about these cards is each one is different and you can add your own personal touch. We were inspired by our love of nature and DIY personality. The holiday season will be here before we know it, so get ahead of the busy time and start with making these fun and easy cards.
Supplies
DIY card supplies
Card stock
Nature inspired stamps (pine tree twigs, leaves, pine cones, evergreen twigs,etc)
Paper cutter
Speedball block print ink
Plexiglas for ink rolling (any flat surface works)
Ink roller
Pens, markers, ribbon
Optional:
gloves to avoid getting ink on hands
Newspaper for work area
Stickers, glitter, etc.
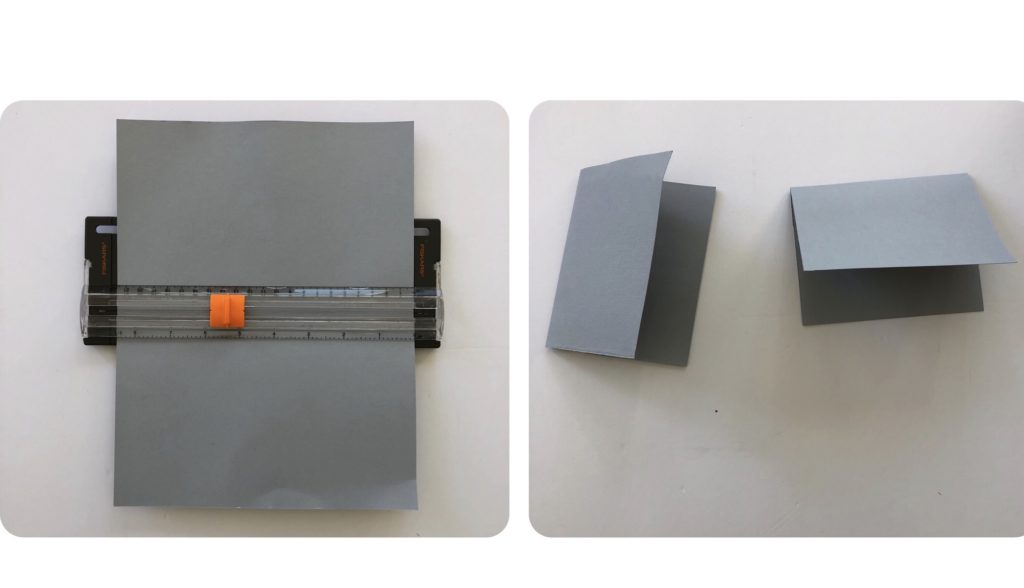
Step 1:
Cut card stock in half and fold each half in half to create 2 cards. Set aside.
Step 2:
Spread ink evenly onto prepared space.
Step 3:
Press twig into ink. Make sure the entire twig gets emerged into the ink to ensure the full effect of the stamp.
Step 4:
Press twig firmly onto card stock. Set aside and let dry.
Step 5:
Add your creative touch with markers, ribbon, glitter, and stickers.
With the holiday season quickly approaching, get ahead of the game and make your holiday cards early. We hope you enjoy making these easy nature-stamped holiday cards. Remember, let your creative mind sore! Enjoy your last few days of fall.
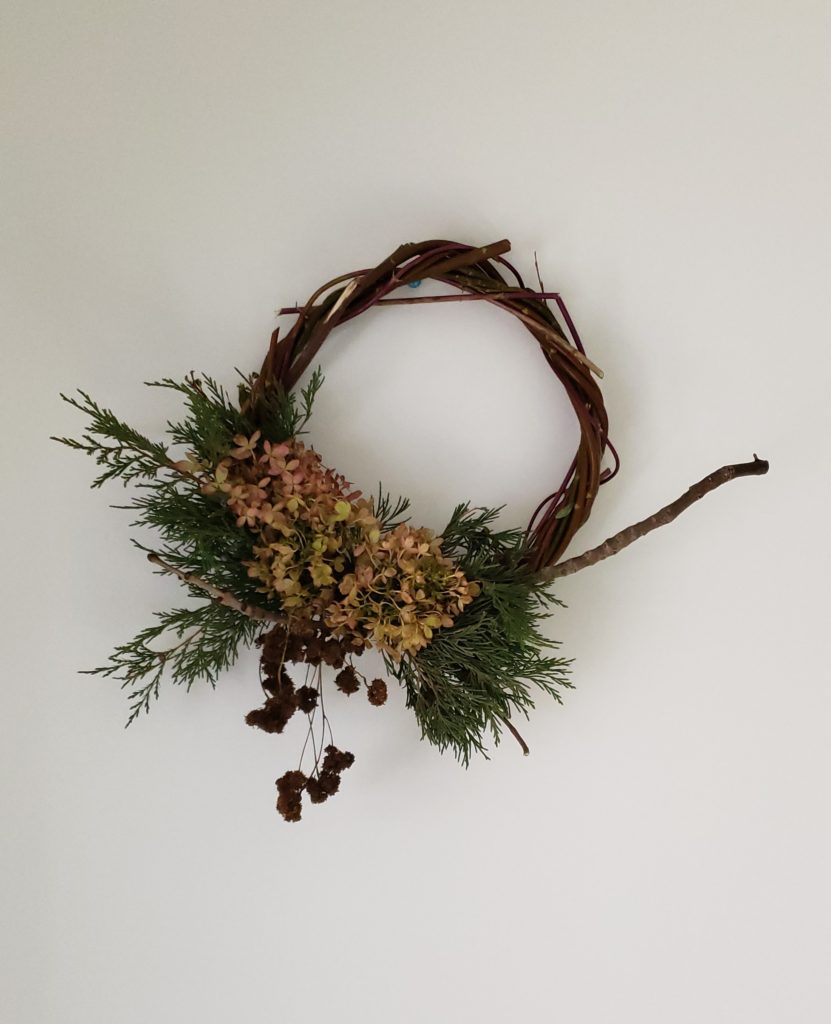
Do you look for a new wreath every season? Did you know you can make a foraged wreath from you own yard…or your neighbors? With a few foraged twigs and leaves you can put together a wreath in no time at all.
Foraged wreaths are so amazing. Each one is unique. The best thing about a foraged wreath from your yard..or your neighbors is that you made it!! A foraged wreath does not need to be perfect.
What is a foraged wreath? The word forage basically means “in search of” . In this case we are in search of natural materials for our wreath.
I am going to give you a supply list. This list is just the basics that you need for making your wreath. Please feel free to add anything you find to your wreath. We are making this wreath without a wreath form. The form will be made from foraged materials.
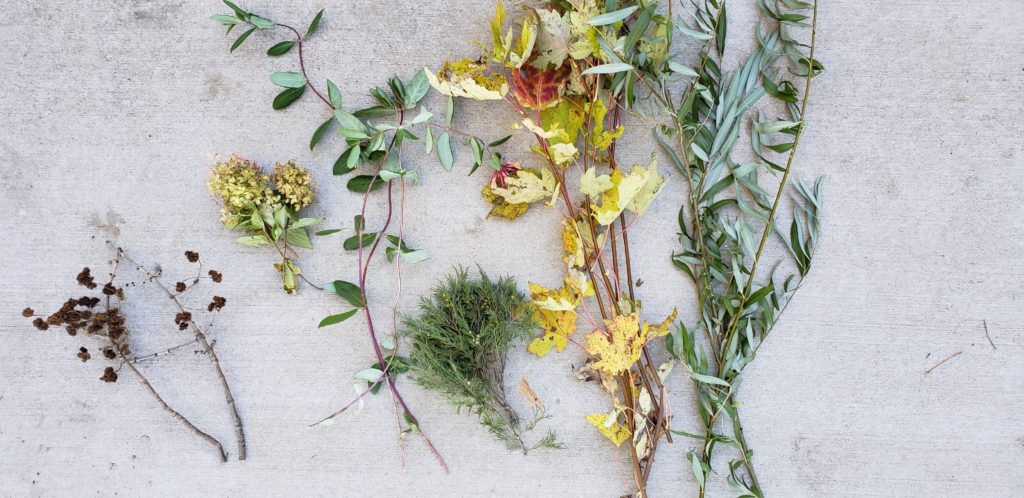
foraged goodies
Supplies
floral wire
needle nosed pliers
clippers
bendable twigs/branches
foraged goodies
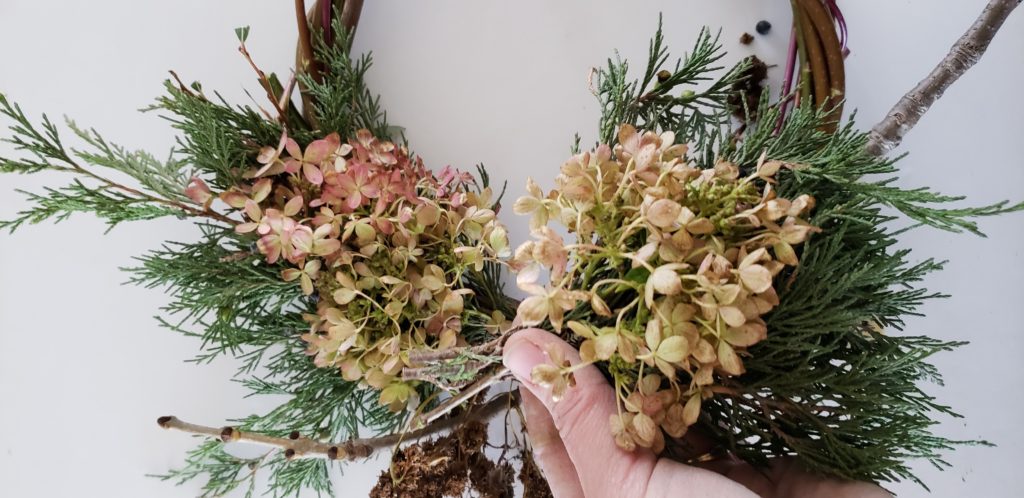
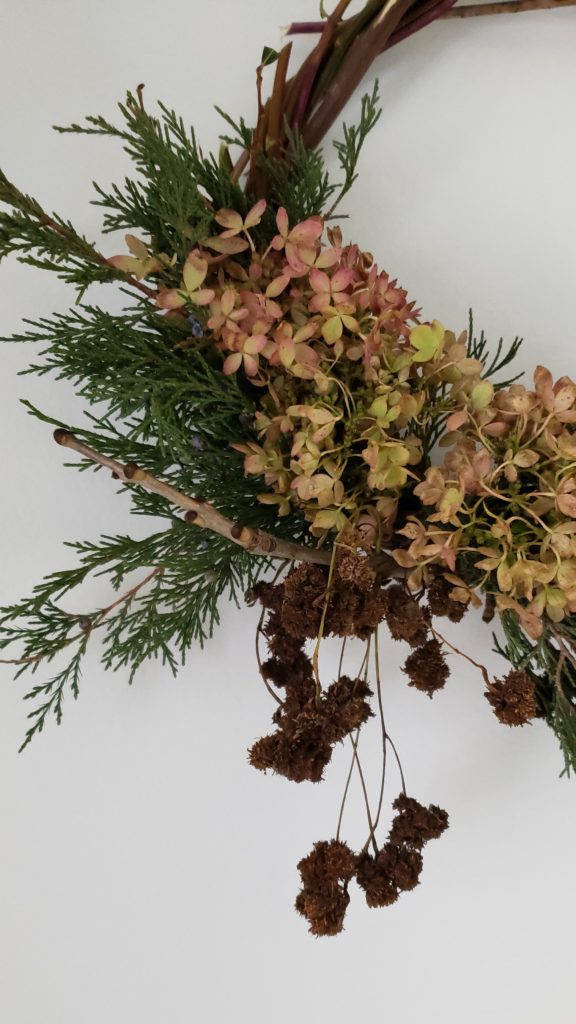
In the above photo, I foraged hybrid willow branches, young maple branches, hydrangea blooms, cedar clippings and ash twigs with seeds
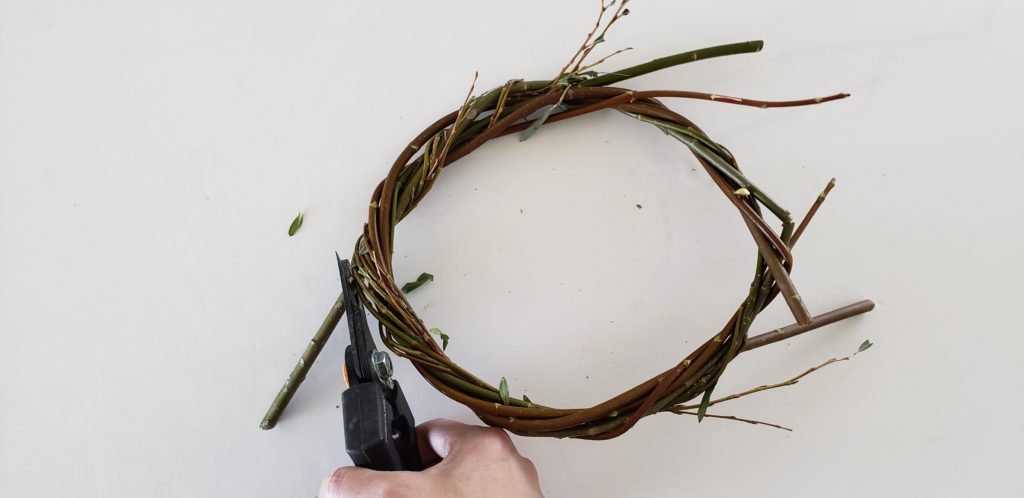
Step 1 making the wreath form
Take your longest bendable branch and make the desired size circle leaving the rest of the branch free. With your non dominant hand hold the branch together where you connect the circle, then with your dominant hand wrap the remaining branch in and around the circle.
To add your next branch. Insert the thickest end of the branch through the base about 6 inches. Hold the branch with your non dominant hand to the top inside of the wreath. With your dominant hand wrap the branch in and around the base until you have wrapped the entire branch. Weave the end of the branch into the wreath. Continue adding branches until you reach you desired thickness. Use the clippers to cut off the ends of the branches that are sticking out. Like I mentioned earlier. There is no rules! Make your wreath as thick or thin as you like.
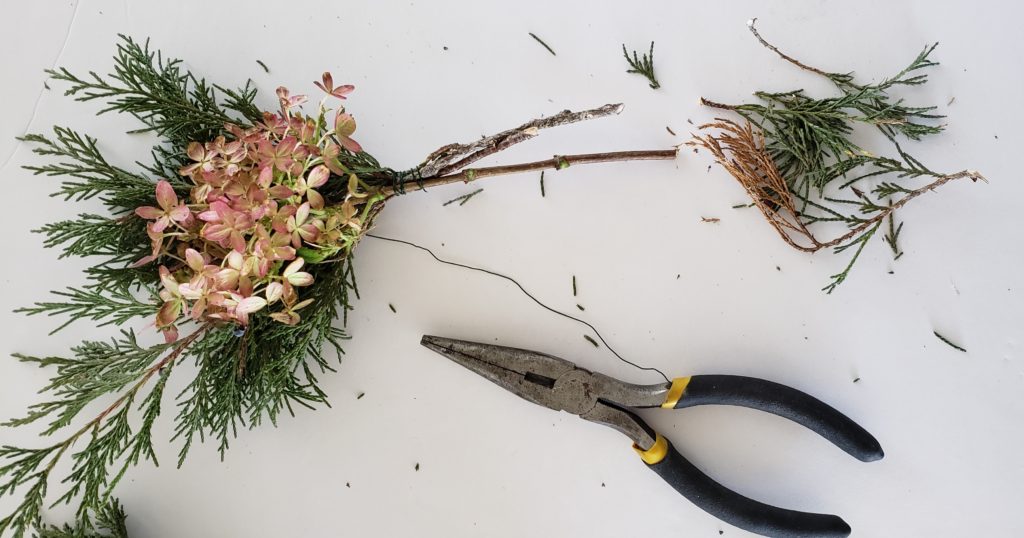
Step 2 Adding foraged materials
Divide your foliage and flowers into small bunches and secure with a small piece of the floral wire. For my wreath I used 3 bunches. It works best to have your greenery in the back of the bunch and your focal floral in the front.
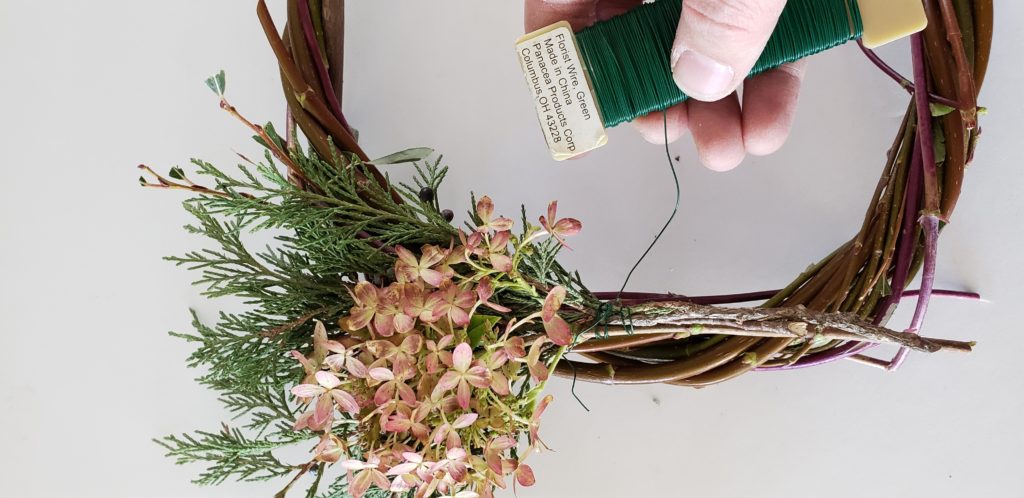
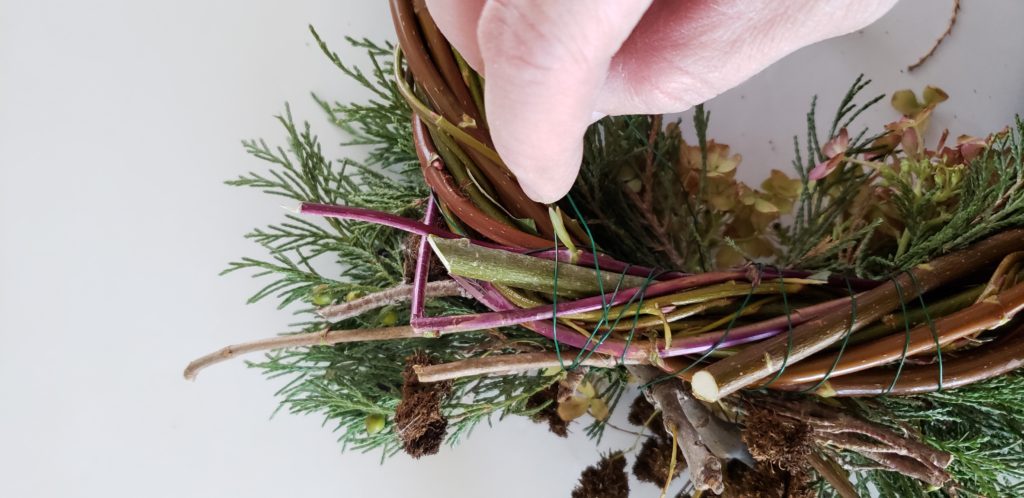
Attach the floral wire to your wreath base. Lay your bunch on the base and wrap securely several times around with the wire. Add your next bunch just below your first secured bunch and wrap with the wire.
If you are only going to put the bunches part way around the wreath base. Attach the last one in the opposite direction as the rest to give the end a clean finish.
Add other items you have foraged the same way with the wire.
Finishing
To finish the wreath. Wrap the remaining end of the wire around the stems on the back of the wreath form.
Cut a piece of wire about 4″ in length. On the back of the wreath at the top weave the piece of wire through some branches and back out. Twist the 2 ends together. This will be your hanger for your wreath.

 Well, well those greeting cards are going to start filling your mailboxes before you know it. Nature-stamped holiday cards are fun and easy to create. The best thing about these cards is each one is different and you can add your own personal touch. We were inspired by our love of nature and DIY personality. The holiday season will be here before we know it, so get ahead of the busy time and start with making these fun and easy cards.
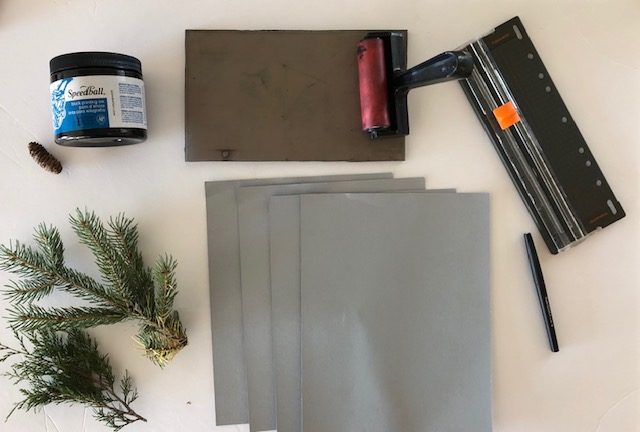

 Do you look for a new wreath every season? Did you know you can make a foraged wreath from you own yard…or your neighbors? With a few foraged twigs and leaves you can put together a wreath in no time at all.