Sending out a quick hello!
Doing some tech updates….
Rhonda
Hey it’s me. It’s a new year, a good time for planning the flowers here at Midwest Cut Flowers.
I am going to go about this blog a little differently than I have in the past. Notice the title. It is week 5 of this year on the farm. It will be easier for me to log what I am doing every week, then lets say….a post on “how to dig dahlias” etc. There are plenty of great blog posts out there on that kind of stuff….I will for sure share links to that kind of fabulous education. There will also be a recipe every now and again for those who have been enjoying them. Believe me…a good recipe is a good recipe.
So…..are you ready??
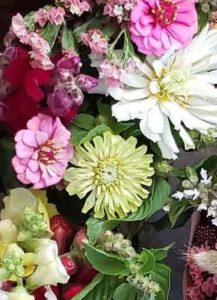
Planning the flowers on a flower farm is a little comparable to planning your cutting garden, only on a much larger scale. You want to have enough blooms along with plenty of foliage to make a nice looking bouquet. This is how I plan for the next growing season.
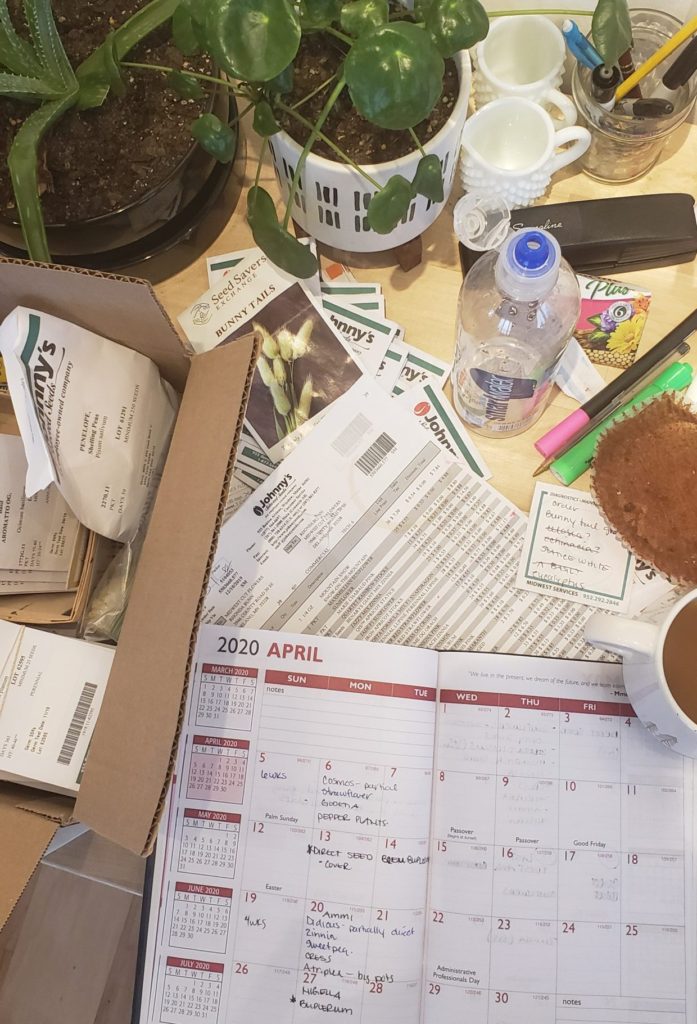
Using the information on the back of the seed packet, I look to see if the seed company recommends direct seeding or transplanting. I put all the direct seed varieties into a separate pile. Next, I group all the seed packages according to how long before the last frost date they need to be sowed. Ex. if the package says sow 10-12 weeks before last frost, then all those varieties go into a pile etc. 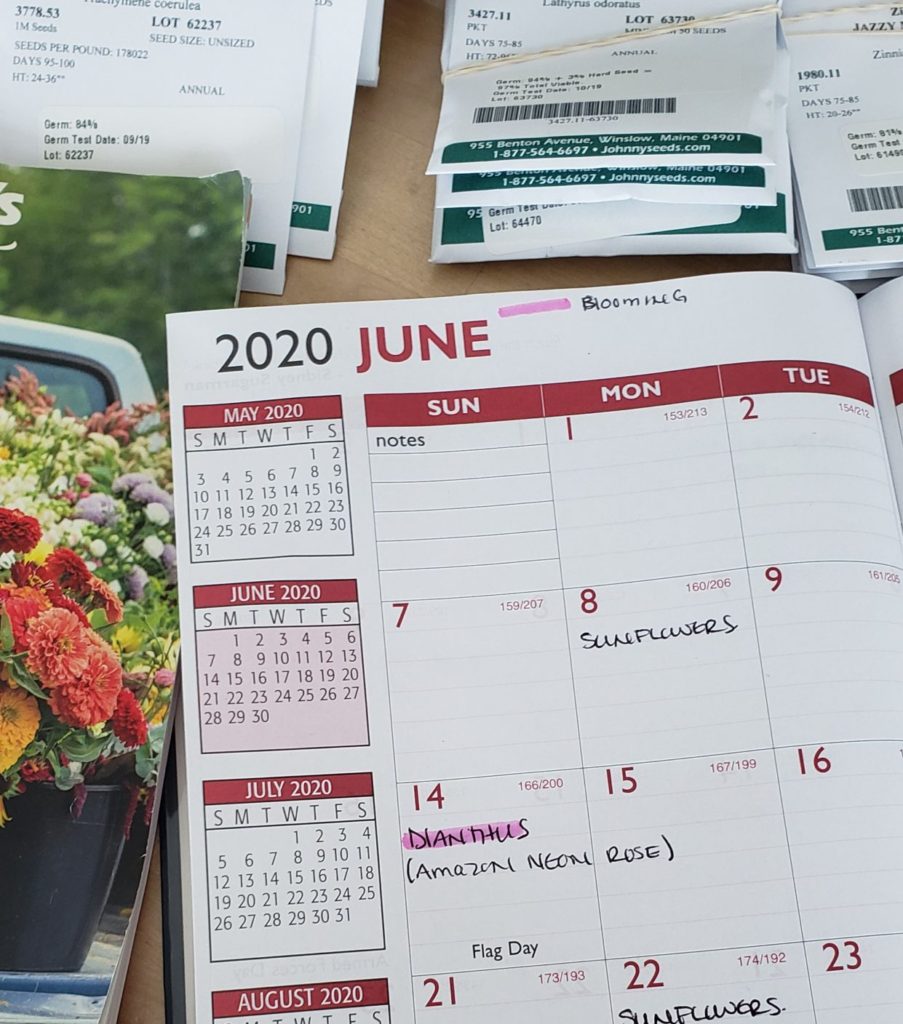
Our last average frost date here is May 11th. So I plan according to that. I count back 12 weeks from the last frost date and enter the varieties that need to be sowed then on that week. This procedure follows for the rest of my seeds. The next piece of information I want to know is, when can I expect them to bloom. Again, referring to the seed package, I count the days forward from the sow time to the amount of days it takes to bloom. Example the package says “days 110-120” this means it should take around that number of days to bloom.
This has been my biggest challenge so far. It takes quite a few stems to make a decent bouquet but you don’t want that bouquet to be just flowers or just foliage. So this year, I highlighted the expected bloom date for the flowers in pink and the foliage in green. Wabam! So cool to see what I can expect in lets say the 3rd week of July. Farming is not for the faint of heart. It is a lot of work….and you are at the mercy of “Mother Nature”…you know she will blow at 30 mph just after your dahilas start to bloom….or decide to freeze just once more…but never the less…I love it.
Here is a little flashback from 2yrs ago! Wow, I have come a long way!!!
and as always….if want to watch more progress….subscribe. You will get my updates right in your inbox…ta da! Sorry no spam, just an update.
Kiisseli, Finnish berry sauce is one of those things. When I eat it…it brings back so many memories. My Mamma made kiisseli all the time. Blueberry kiisseli, strawberry kiisseli, mixed berry kiisseli. It brings me back to sauna nights at Mamma and Pappa’s house. Coming out of the sauna squeeky clean, hair wet and Mamma hustling you over to a bowl of ice cream topped with Kiisseli.
 This is one of my favorite Finnish recipes. I hope you enjoy it.
Oh did I tell you it is quite healthy…..
and yummy…
and is it really a soup? Not sure. Eaten alone lets call it soup and eaten over something, lets call is sauce.
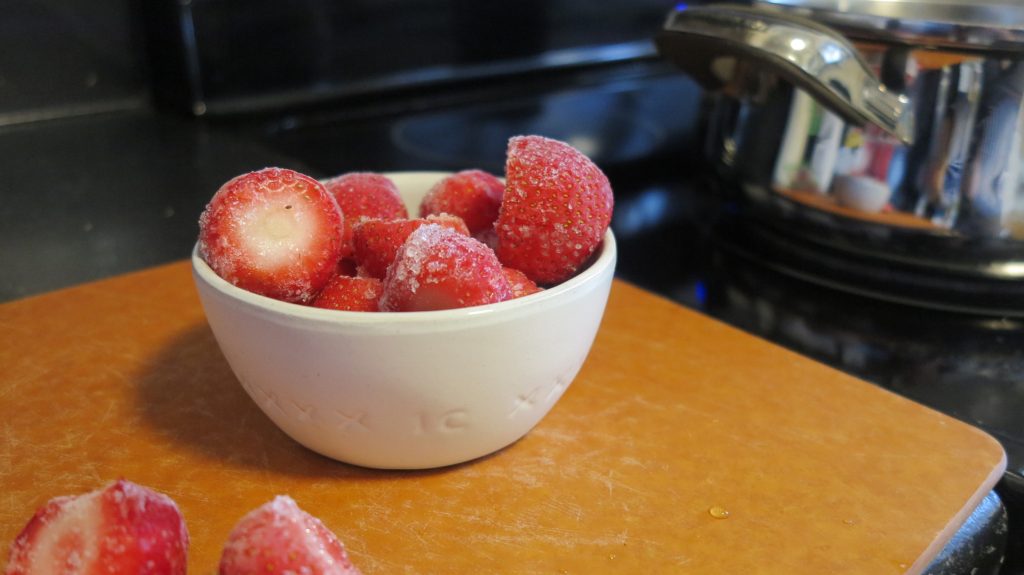
Measure out your berries, sugar. Add your water to a medium sized pot and bring to a boil.
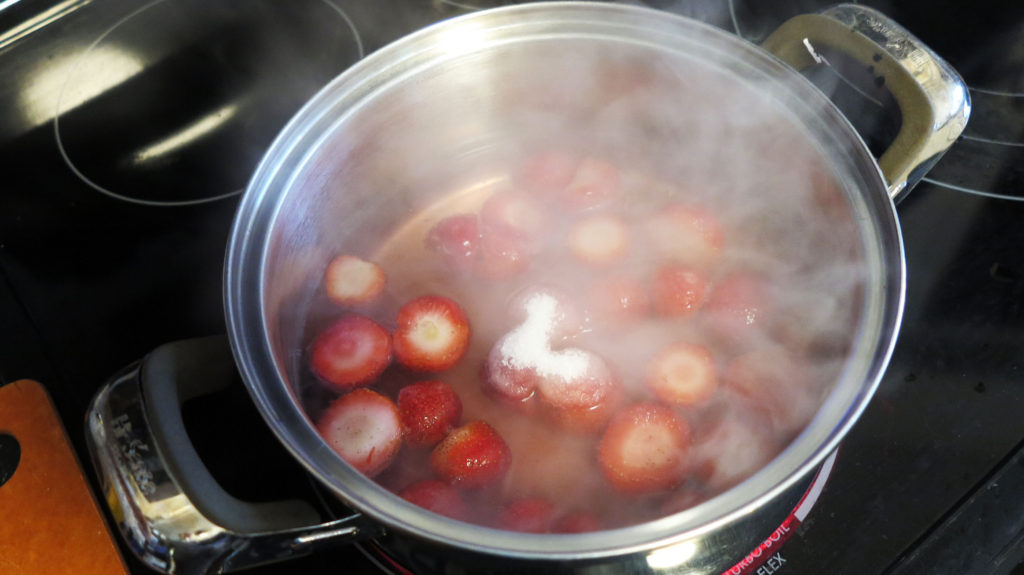
Carefully add your berries and sugar to the boiling water. Turn heat to medium and let boil for at least 10 minutes.
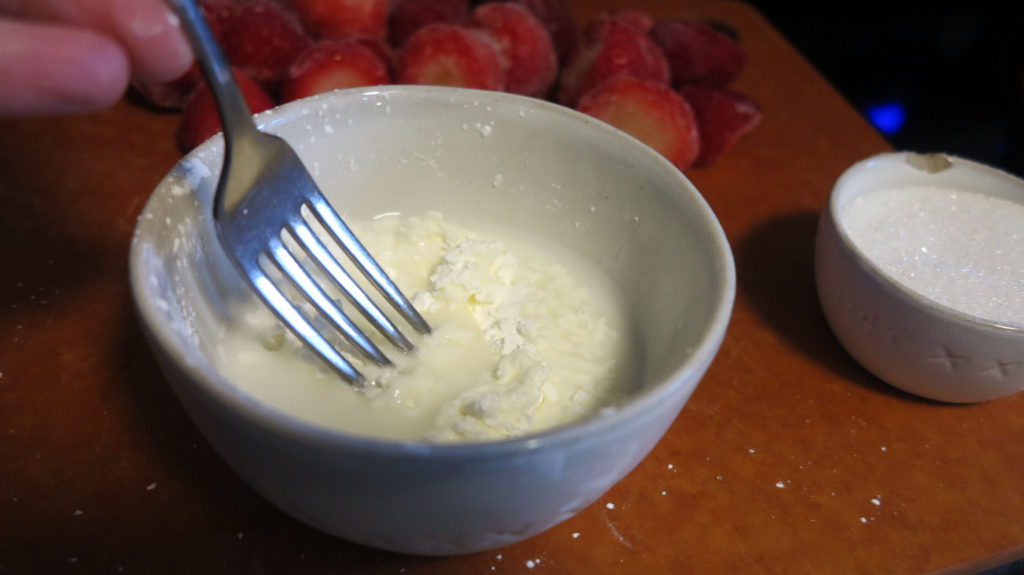
Measure the potato starch or what ever thickener you choose and water into a small bowl and mix well.
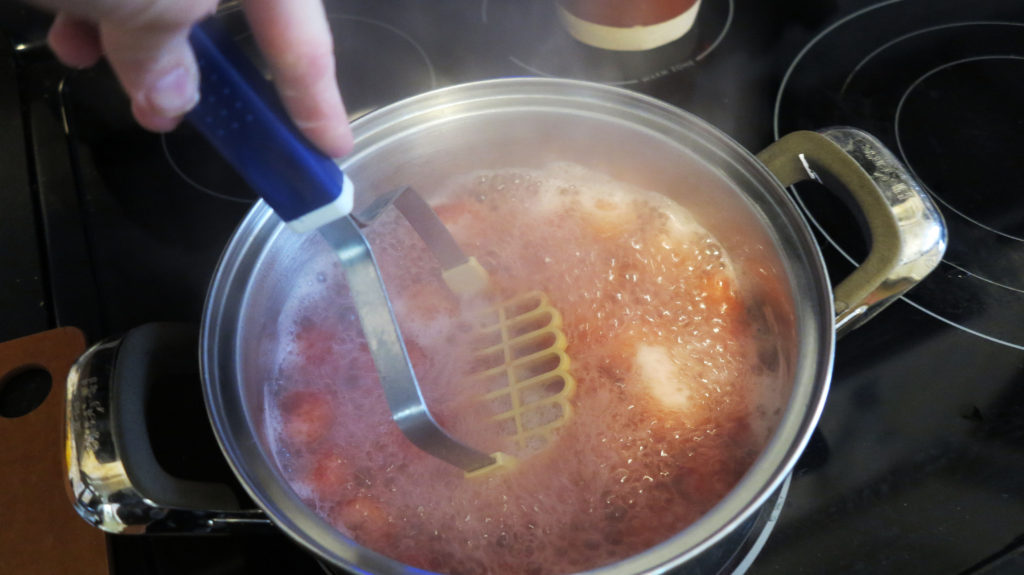
Using a potato masher, mash up the cooked berries.
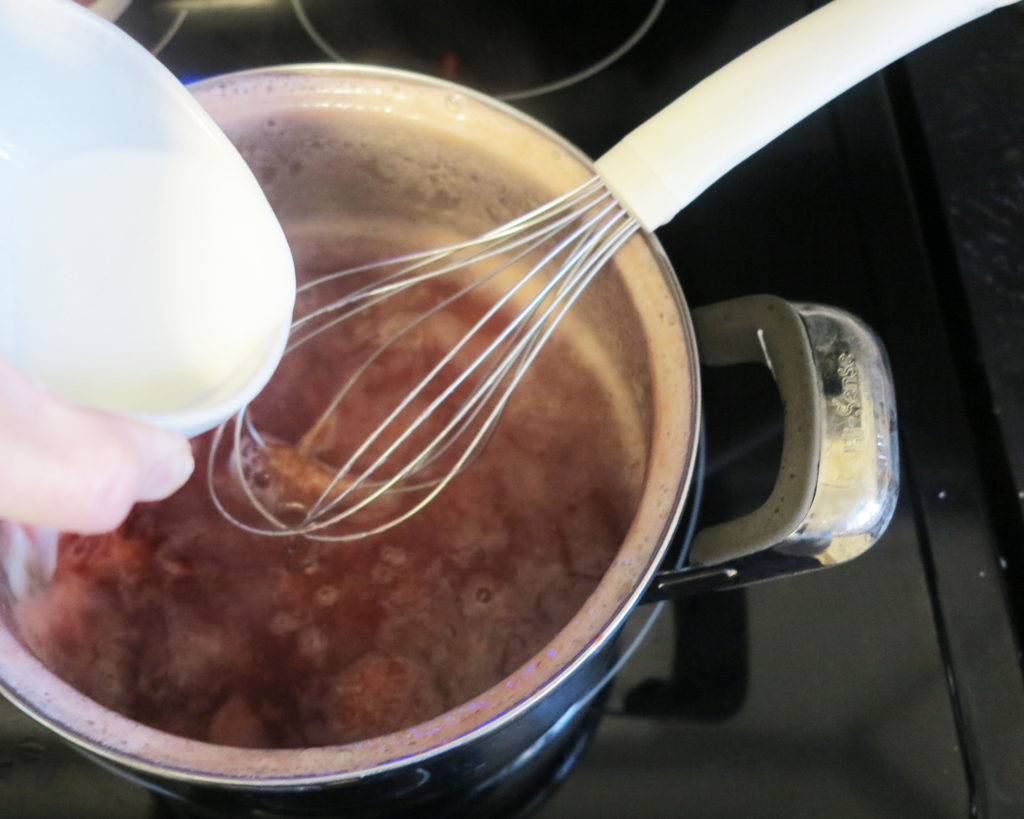
Remove the pot from the heat. Slowly pour in your thickener while whisking. Whisk until the sauce, soup is smooth.
Put the pot back on the heat. Turn heat to low and simmer until slightly thickened.
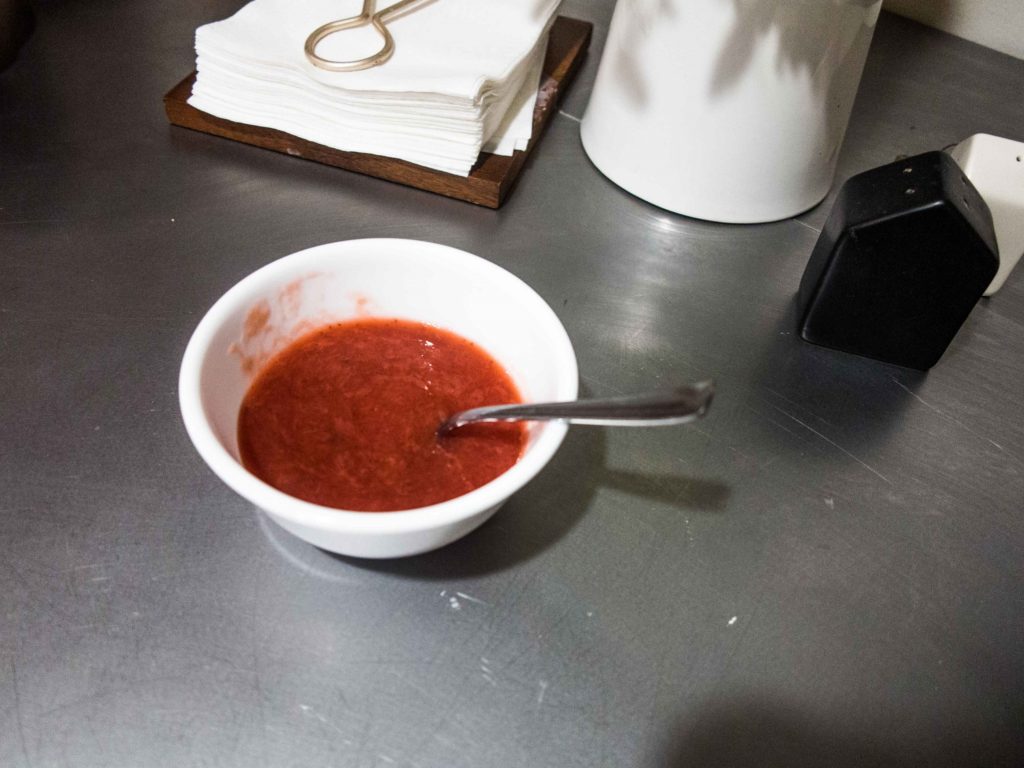
Remove from heat. Cool and enjoy.
The sauce will thicken as it cools.

A quick and easy fruit soup/ sauce recipe
Bring the water to a boil over medium high heat. Once boiling, slowly add in the berries and sugar. Boil for 10 minutes. Using the potato masher, mash the berries.
In a small bowl, mix together the starch and water until smooth.
Remove the pot from the heat and whisk in the starch mixture. Keep whisking until smooth.
Return the pot to the heat and turn the heat to low.
Simmer until thickened. Approx 10 minutes.
Remove from heat. Cool and enjoy.
It will thicken as it cools.
Store extra sauce in a sealed container in the refrigerator.
How do you eat Kiisseli,Finnish berry soup/sauce…. This sauce can be eaten alone or used as a topping for ice cream, oatmeal or rice pudding. It is a super common dessert in Finland. You can eat it hot or cold. I like it both ways.
I am going to tell you to store left over Kiisseli in the fridge. However, I leave it out on the counter in a covered container…It actually isn’t a problem because we eat it so fast.
Kiisseli is not that sweet. What you will taste is the flavor of the berries which is enhanced by the small amount of sugar.
Yes.
Potato starch is pure starch thickener, so it thickens the almost boiling liquid quickly. You can usually get by using less potato starch than corn starch. However, you will find that people suggest a 1:1 ratio.
No it is not a seasonal food. I suppose you can call it that…as in you can have it in every season. It’s that good.
Do you have a favorite ethnic food? Please share!
Are you enjoying my little ramblings and tidbits of news? Subscribe to get my post right in your in box. No spam, no odd stuff, just the new post.
This Finnish pulla recipe would be a perfect addition to Kiisseli….just saying…
Are you looking for the perfect apron? Check this out! This style is one of my favorites.
Wow, the end of 2019 is here! So many exciting things happened this year in flower farming.
Wayzata farmers market The farmers market was such a good experience. Next season I plan to do another market. Delano farmers market is on the list for 2020.
Twin Cities Flower Exchange It was so great to be a part of the fabulous flower outlet!! Looking forward to next year.
This dried flower rack has been a fun addition to my Etsy shop.
Excited about this product photo. Thanks to Nels photo. Loved how the shoot turned out!
What was your favorite thing about 2019? Share in the comments.
Also, Do you like what you see here? Subscribe to my blog and you will get my updates in your inbox. Only new posts? Yes! That is it, no junk.
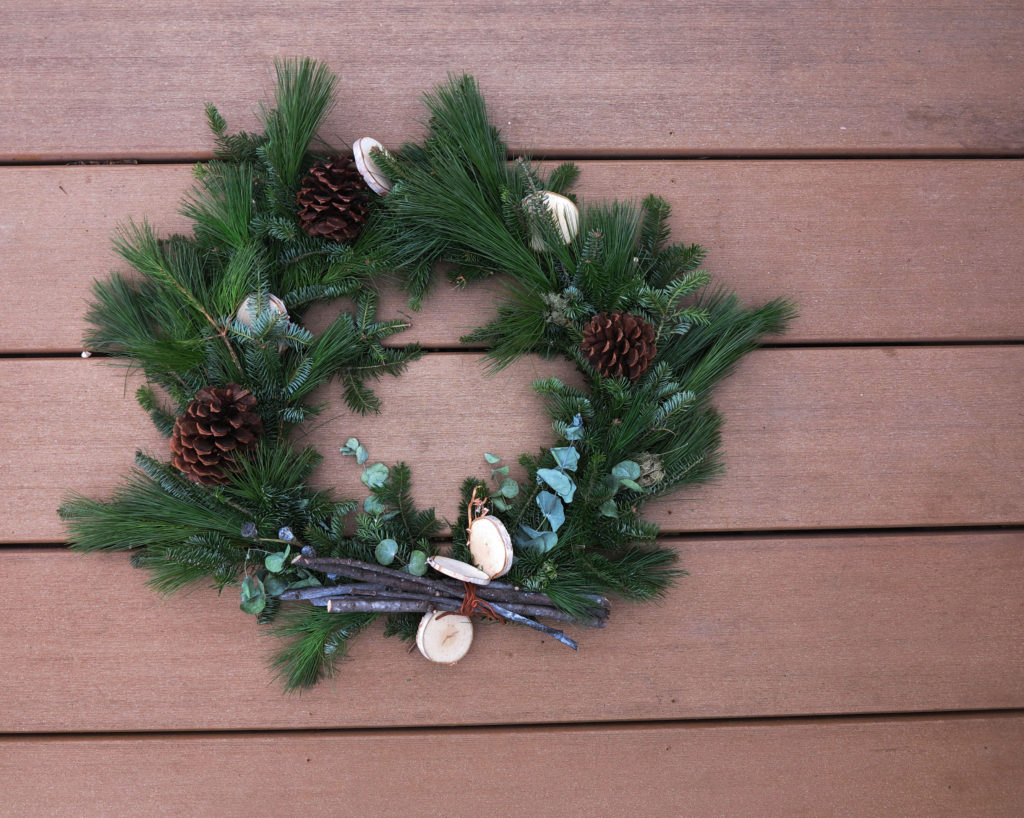
Tis the season for wreaths. This easy DIY tutorial will show you how to make a wreath. It is easy peasy, all you need is a few supplies and your imagination. Like all my other tutorials and this how to make a wreath tutorial, I encourage you to add your own flare. There is no right or wrong. Have fun.
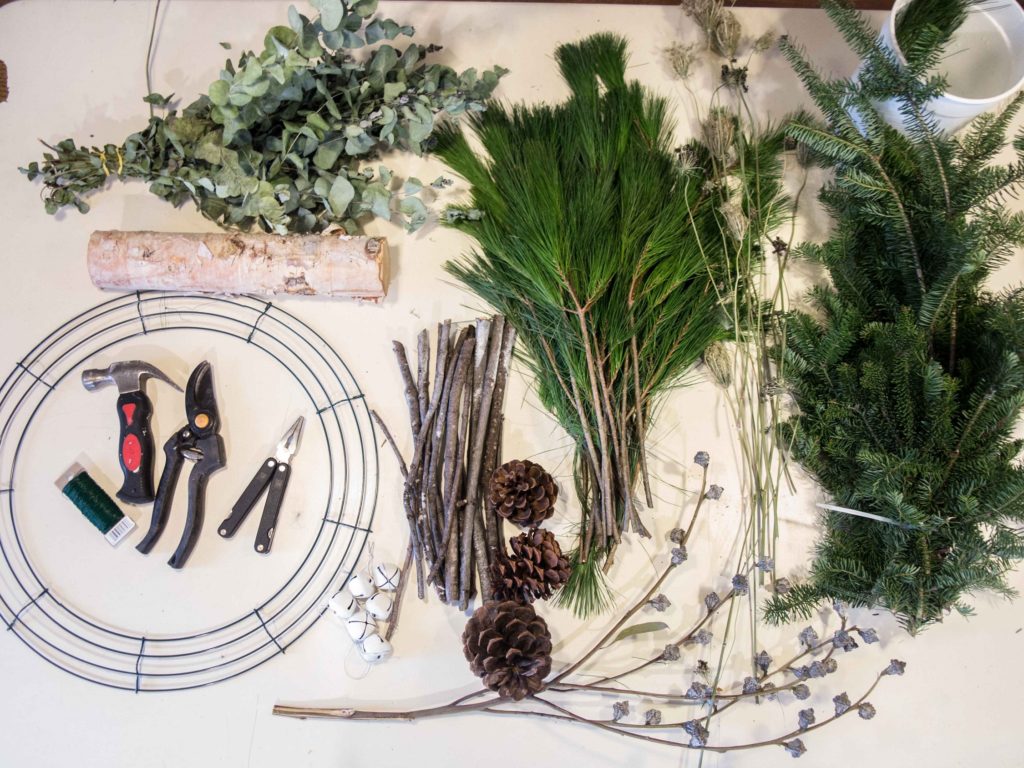
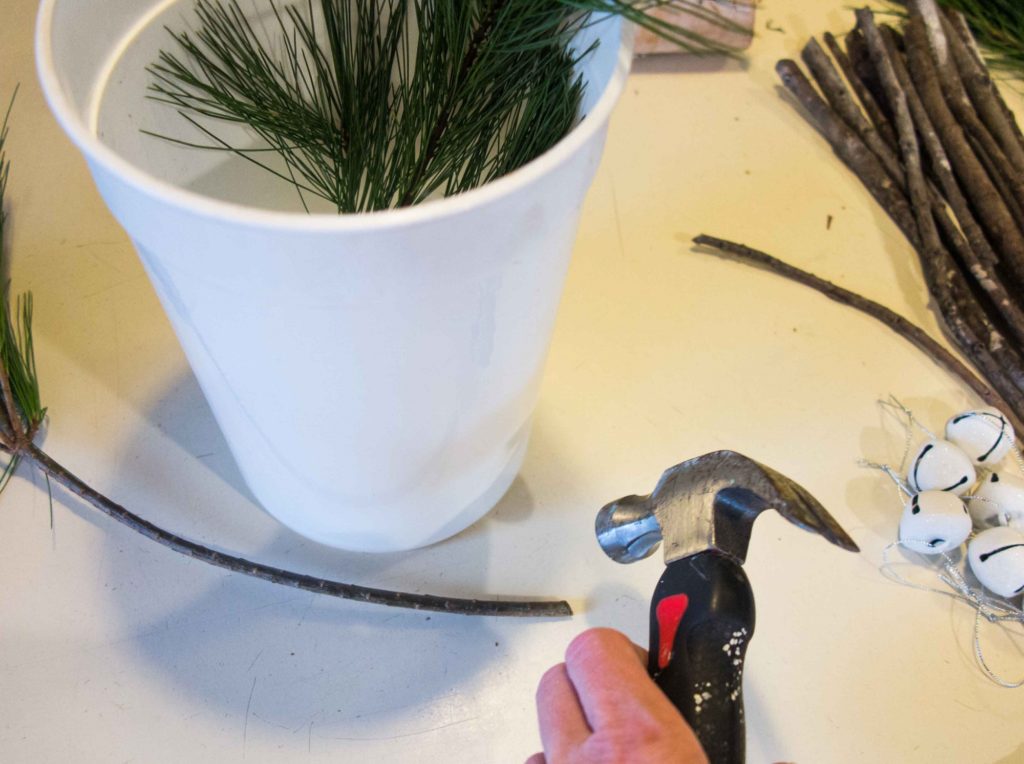
I like to bang all the ends of my greens with a hammer, then put them in water. I think this helps the fresh greenery last longer.
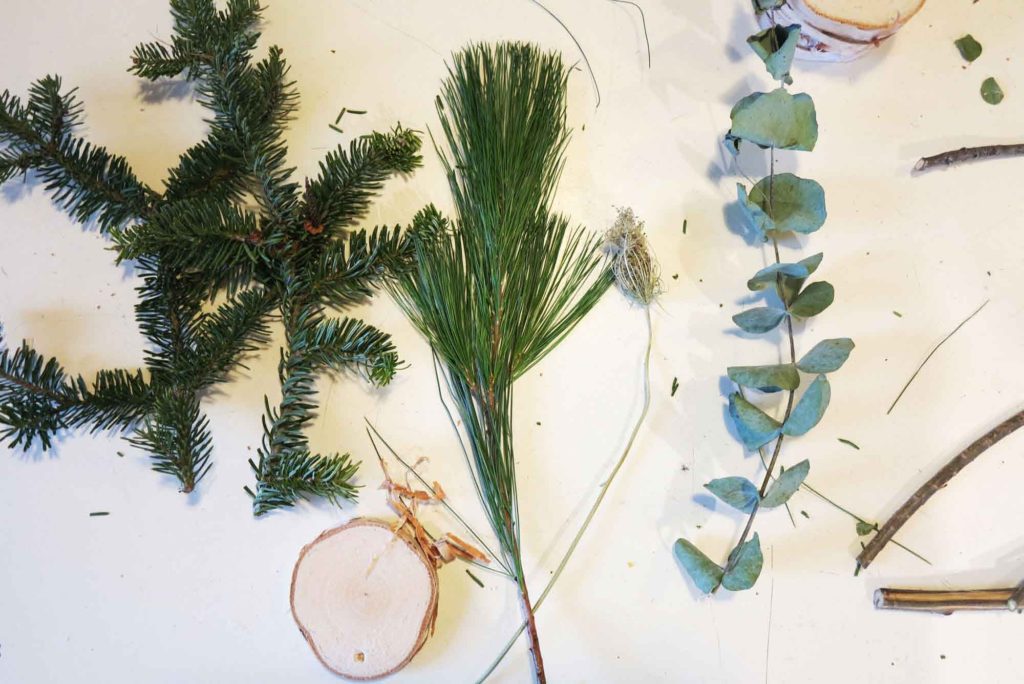
Cut all your greenery and dried flowers to approx the same length. I like to have them about 8-10 inches in length. Cut pieces of floral wire to approximately 8″>
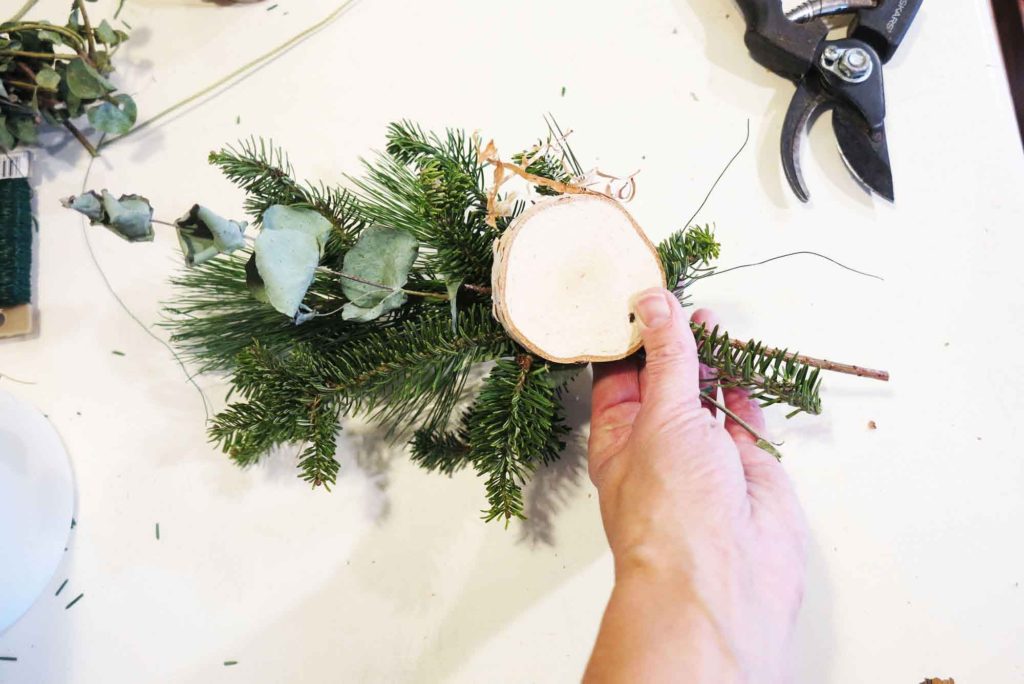
Make bundles with your cut ingredients. Layer at least 3 items together and wrap the bottom with a piece of the cut floral wire. Bundle all your ingredients.

Pick a starting point on your wreath form and attach the floral wire.
Lay out your bundles on your form. Play around with it until you find the design that you like.
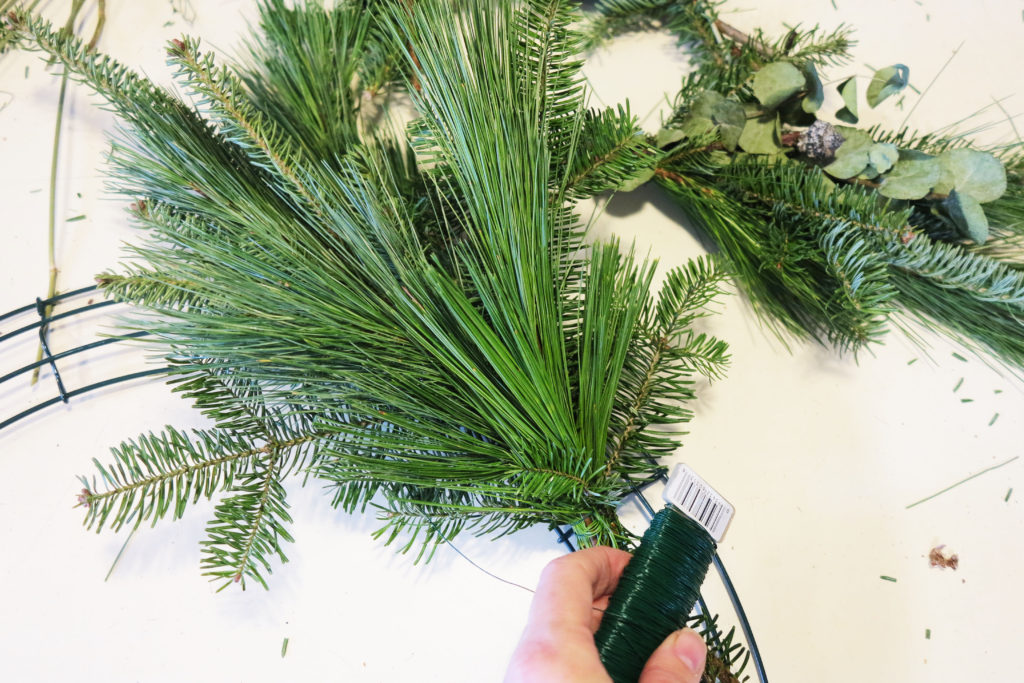
Lay your first bundle down and wrap the floral wire around the bottom of the bundle. Pull tight. Wrap the wire around the form at least twice.
Layer your next bundle over the bottom of the first bundle laid. Again, move it to a position that you like. Do the same thing, wrap the wire around the bottom of the bundle and pull tight.
Continue this until the form is full.
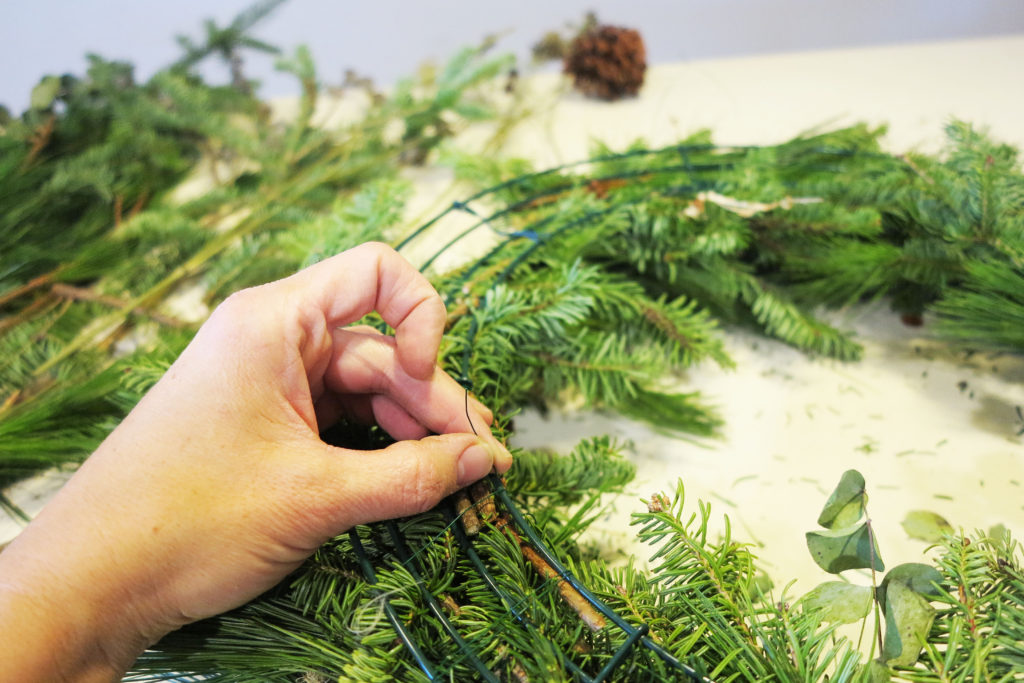
Bring the wire to the back of the wreath. Cut the wire leaving 8″. Wrap the extra wire around the wire of the form pulling tight. Wrap until there is no wire left.
Mist wreath with water and hang on your door or porch wall.
Lightly spray wreath with water to keep greens fresh. A fresh cut wreath will last about 3-4 weeks if misted and kept out of direct sunlight. If you used faux greenery your wreath will last for a few years before needs to be freshened up.
This is another wreath tutorial that you will like.
Here are a few of my favorite wreaths
Eucalyptus wreaths they smell so good!
This one is just flat out gorgeous!
Do you like what you see here? Subscribe to receive my posts right to your inbox. All you get is the new post….that’s all. No junk, just fun.
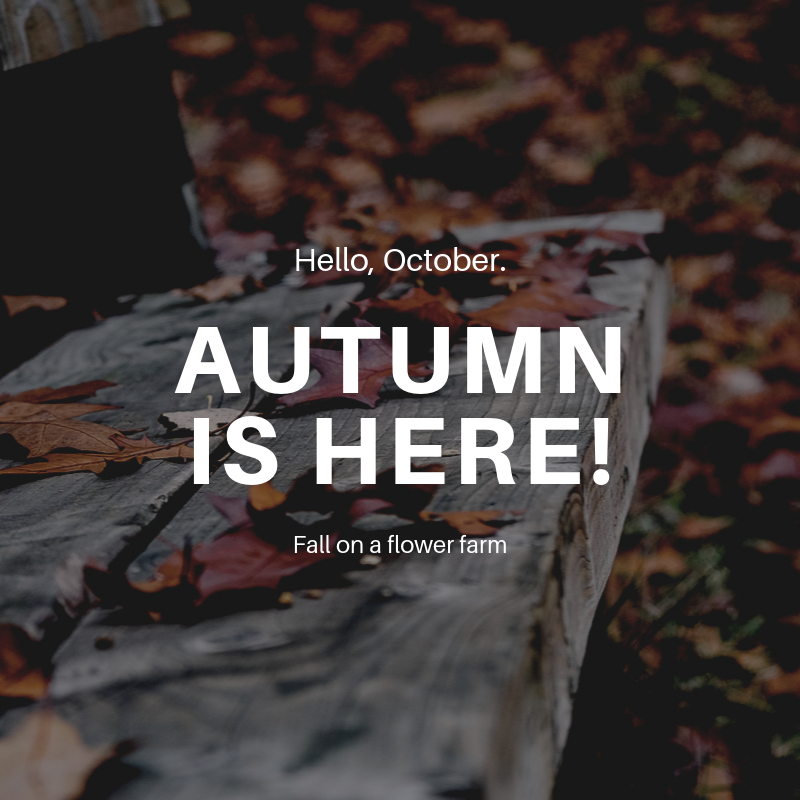 Autumn is here!! Fall on a flower farm is definitely a busy time. As I write that….I am thinking…spring is a busy time, summer is busy time…..the only down time is probably winter.
Somehow I think I willed Mr. Frost to come… there comes a point in the growing season for me when I am just tired.
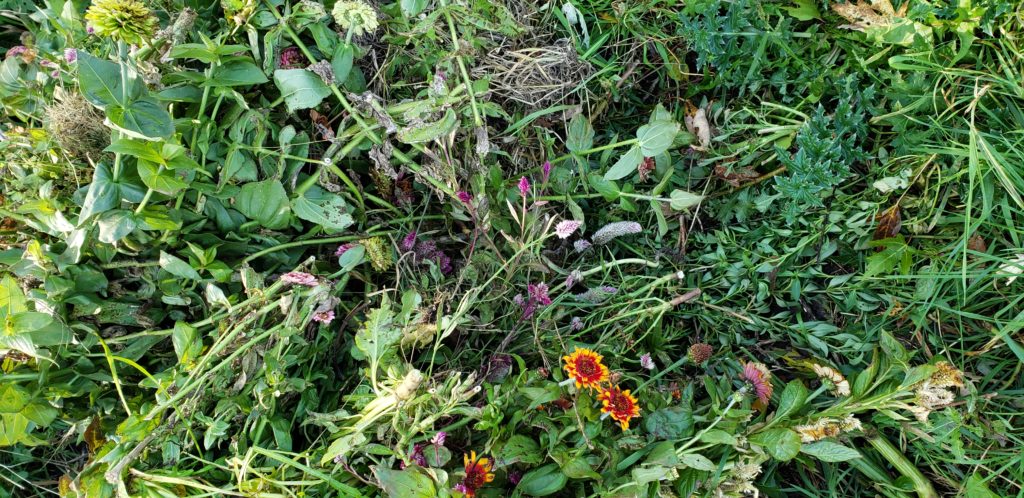
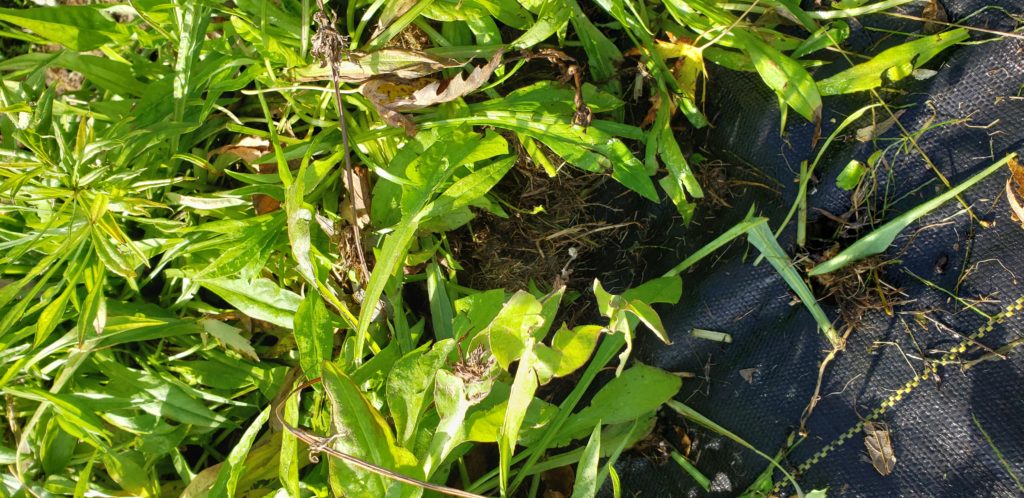
Out in the field I am working on cleaning up all the beds. That means I am cutting plants at their base and throwing them into the compost pile. I am leaving the roots in the soil to decompose to add organic matter. After the plants are pulled, then I take apart the drip hoses and store them in the garage so they do not freeze. I am hoping to get at least 3 growing seasons out of this round of hose. The landscape fabric is the next thing to come off the flower beds. This also is being stored in the garage.

Storing dahlias can be overwhelming if you overthink the process. If you live in zone 7 or less you must dig up your dahlias and store them for the winter. Make sure you label your plants before frost. Here is a little simple guide to help you.
Store in saw dust or shredded news paper. Do not seal your container that you are storing your dahlias in. Allow some breathing space. Store your dahlia’s in a cool, dark spot.
Tool storage is another fall thing that needs to be done. I am clearing a spot in the lower garage for all my garden tools. I clean my hand tools in a bleach water solution and dry them. This will take care of any bacteria or disease that my be lingering on them.
Buying flower seeds is one of my favorite things to do. I have been buying most of my seeds from Johnnys selected seeds. They have a great selection and I have not been disappointed. Watch for some new additions to the varieties that I grow. Exciting!!!!!
Now that the growing season is over and clean up is almost finished, you are probably wondering what I am going to do now. During the winter months I focus on my Etsy shop and am way, way better about writing new posts. I am looking forward to coming up with a schedule for my blog so I can keep you in the loop on a consistent basis.
What are you looking for? Recipes, tutorials? Let me know in the comment section. It is always nice to get a little feedback. Don’t be shy….I love hearing from you.
Where can I find more time? Do you know? Walmart? Target? The flowers are blooming like crazy. August sure has surprised me again. I need to keep better notes because then I would know….flowers are amazing in August here in the midwest. Dahlia’s ahhh so gorgeous and the zinnias keep amazing me.

There are so many varieties of Dahlia’s. Some make a good cut flower and some do not. The vase life on some are not that great.
Dahlia’s are quite a bit of work. I have to dig them up after a good hard frost and store them until next spring. This leaves about 7 months for things to happen to the tubers…. Last year I lost some tubers to mold. Note to self for this year. Make sure the tubers are totally dry before storing.

Zinnia’s are so amazing. They too come in so many different varieties. This year one the varieties that I planted was the Giant Lime from the benary’s line. They are so cool. Huge lime green flowers! Who would have thought.


I start harvesting for the farmers market Wednesday evenings and then finish up Thursday mornings. Last market was almost sold out!

I think consistency pays off. People are now getting used to seeing me at the market. I have started to have some regular customers. It is so rewarding! Do you buy from farmers markets? If not, you should! You can talk to the growers and know where your produce, flowers and meats are coming from. Plus, if you have kids, bring them! It is a great family outing!

The heirloom pumpkin patch is doing great. I think we will have a nice batch this year again. Yes, like last year the pumpkin patch will double in size next year.

I hate to post and run but such is life.
Please leave a comment in the comment section. That would make my day!!
Don’t forget to subscribe…you won’t be disappointed, because the flowers are blooming like crazy!
Summer flowers, summer flowers. It is all about the flowers. As the end of summer looms closer, we are working hard to harvest all the summer flowers that we can. Strawflower, ammobium, statice, gomphrena, zinnia and dahlias are coming on strong.

There are a few things that I planted that I will not plant next year. Cerinthe is one of them. It is such a neat plant but the stems are prone to wilting after cutting.

Strawflower has been a beauty. Every time I harvest the papery petals never cease to amaze me.

Strawflower has been around forever. It is an old fashioned flower that has made a huge comeback. I can see why!

The farmers market has been such a great experience. People have been enjoying the variety of flowers that are in the bouquet.

Do you love dried flowers? I didn’t know that I did. Ammobium everlasting is a cut flower that dries fabulous. These are listed in my Etsy shop. A few other flowers that dry well are, statice, gompherna and yarrow. Bunny tail grass is another thing that dries really well.
More recipes are coming!! I have been working on a few more recipes to sneak in here soon. Easy and delicious.
Don’t forget to subscribe to my blog to see what comes next. All you will get is the new blog post….that is all, no junk!
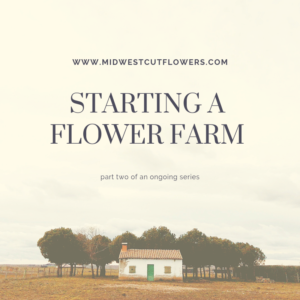 Starting a flower farm (part 2)
Thank you for following along on this “starting a flower farm journey”. You will hopefully be getting a farm update every month! Seed starting, soil amending, sprouting, failures they all will be documented for you. Starting a flower farm has been….interesting. Lots of beautiful pictures out there of armloads of flowers, beautiful farm stands and lush farmers market set ups. Not so many of the mud, bugs, sunburns, sore backs, dead plants and early mornings and rejections. Rejections? Yes!!! Florists a little Leary of a small grower.
I think I am now considered a flower farmer and not just a massive flower gardener…Why? Well this year I plan to have…40 20 ft beds of annuals, 5 20 ft beds of dahlias and a 40 ft by 40 ft heirloom pumpkin patch!
While drawing out my plots and going through my seeds…..I am thinking” yikes I did it!” Year 3 and more then quadrupled in size.
You will find flowers at 2 new outlets this year. In one of those lush farmers market set ups (more information soon)…and participating in the Twin Cities Flower Exchange. Wahoo! They will still be local at Red Rooster Soaps and at the road side stand. On top of that you will be able to buy my dried flowers (sustain-ably grown and chemical free) from my Etsy shop.

Ordering seeds and planning when to start and plant them has been huge for me. I try to keep notes on when I started and planted them from year to year. This year I took a flower farming school online course and it was so helpful.
Where your order or buy your seeds is a matter of preference. There are a lot of good seed companies out there. If you are just buying a few packages of seeds any box or hardware store will have the basic flower seeds.
I have been buying my seeds from Johnny’s selected seeds. I have been really happy with them. They have a great variety to choose from.
Starting seeds is not all cut and dried. Different varieties have different germination times. On the back of your seed package you will find important information. How long to start the seeds before your last frost, do you cover the seed or not? How deep to plant the seed. What kind of light it needs to germinate.
Find out when your last frost date is and circle the date on a calendar. You can count back from that date to find out when you should start your specific seeds.
I draw out my plots on graph paper. This way I know how many plants I can fit into my prepared spaces.
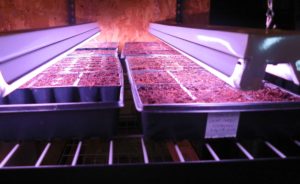
I have started a few seed already. Lisianthus is the slowest to grow. A lot of flower farmers buy the plugs because they take so long to grow. Have I had luck with them……well not super good luck. A lot of seedlings have been lost. We are hoping to end up with at least 40 plants this year…cross your fingers…to many seasoned farmers this sounds like a piddly amount but hey!
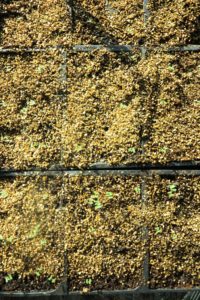
The eucalyptus seedlings are doing great. This is my first try at growing eucalyptus. So far so good.
Here is some information on how I start my flower seeds. This way has worked great for me.
I have gotten amazing information from floret. From seed starting to what cut flowers are the best to grow. This website is a great resource.
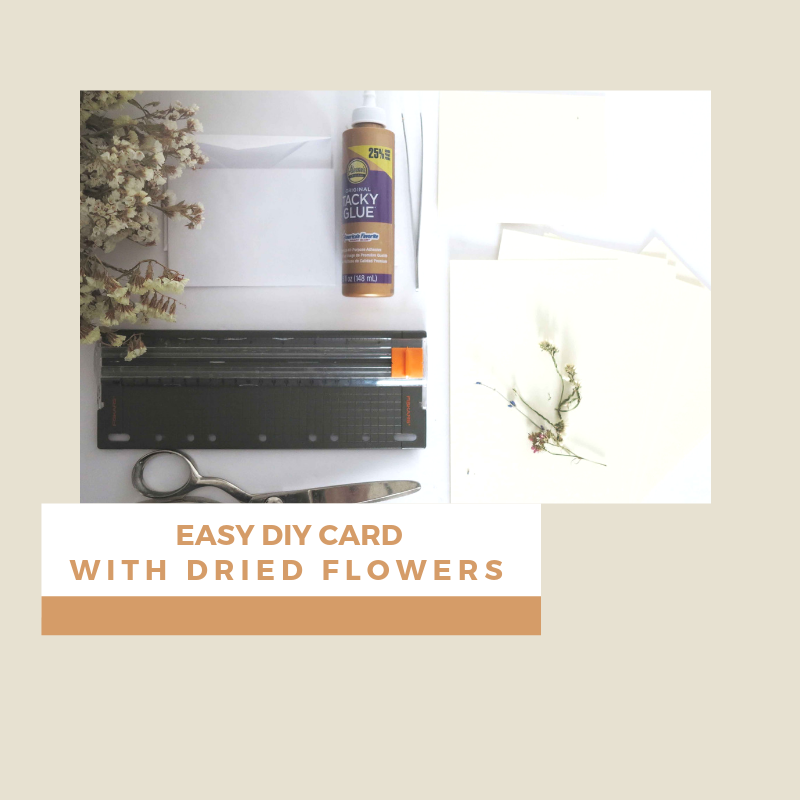 Are you a DIY’er? Even if you are not this Easy DIY Card made with dried flowers will be a joy to make and give. The DIY card is perfect for every occasion.
Giving cards is a custom that dates back many years. The tradition can be traced by to the early Chinese, who gave greetings of goodwill on cards for the new year. These cards were only sent during this time, unlike today were we give cards for many occasions. The card giving traditions of today really took off after the introduction of the postage stamp and new technologies in the printing world. This gave people a more affordable avenue to send greeting to their loved ones.
Now we have the ability to send messages on our cell phones but….I love getting cards in the mail.
How about you? Does a good slow mail day lift your spirits?
Like all of my tutorials. I encourage you to use this as a guide. Let your creative mind take over and apply your own touches to your project.
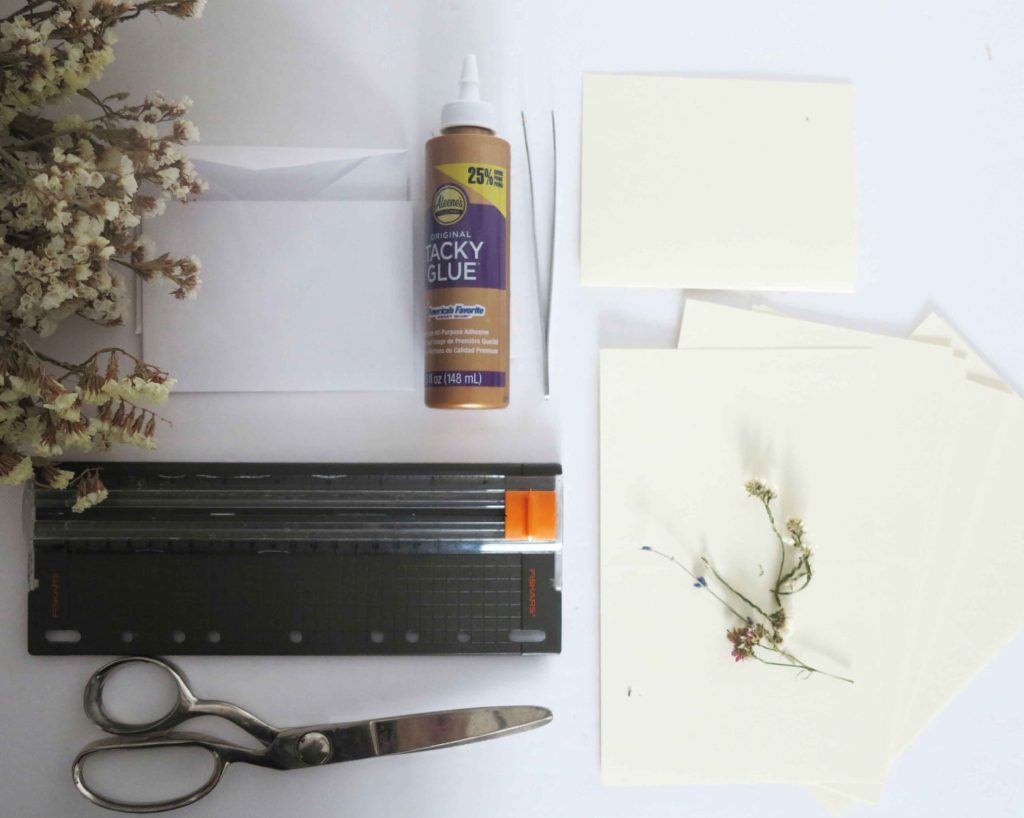
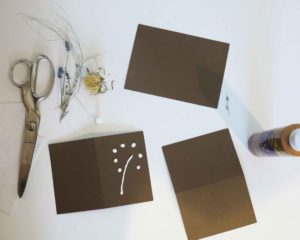
8″ x 11″Card Stock
Envelopes (invitation size)
Glue ( that will dry clear)
Scissors
Dried Flowers ( the flatter the better)
Ruler or paper-cutter
Pencil
tweezers
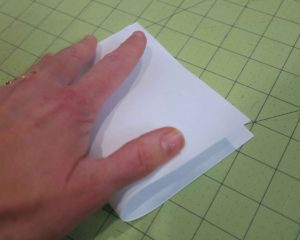 1. Bend the card stock in half, short side to short side as if you are going to crease the fold. Pinch the end where you would crease.
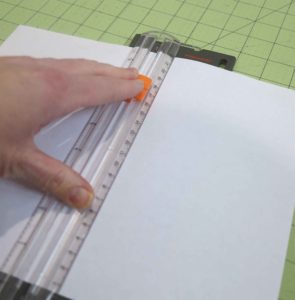
2. Using your paper-cutter line up the crease and cut the card stock in half. If you are using scissors, draw a light line with your ruler and pencil from the center where you pinched your card stock and cut along that line.
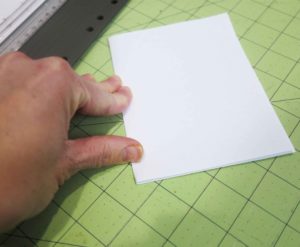
3. Now fold your cut card stock in half, running your finger firmly along the crease.
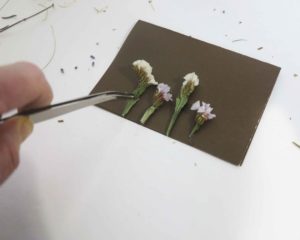
4. Take your dried flowers and play around with your design. The flatter your design the better. Experiment with pulling the petals off, flattening the flowers and moving the flowers around. Using your pencil mark a very light mark where you are going to glue your dried flowers.
5. Trace your design with the glue. Make sure you apply a nice amount. The flowers need to be pressed into the glue.
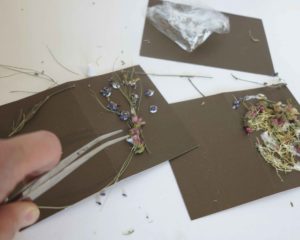
6. Place your dried flowers on the glue and firmly yet carefully press the flowers into the glue. The glue will squish out a bit but leave it, do not try to wipe it off. The glue will dry and encase the flowers, securing them to the card.
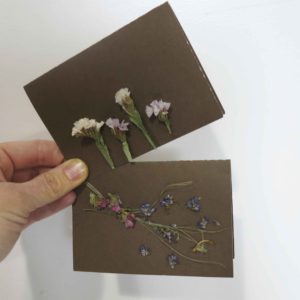
7. Let dry for 1 hour.
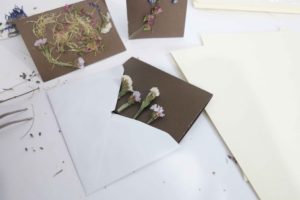
So that is it. Easy peasy. This is a great easy craft to do with kids. It is so special to receive a handmade card.
Want more flower tutorials? Subscribe to our email to be notified of the newest post.
What kind of projects do you do with dried flowers? Please share in the comment section. I would love to know.
Do I have to use card stock?
Yes I would use card stock because you need a firm backing for the flowers.
Can I used pressed flowers?
Yes! Pressed flowers would be awesome.
Can I send these cards through the mail?
Yes you can. It would be good to put a piece of waxed paper on top of your flower design to protect it.
Here is another one of our card tutorials. Enjoy?
Share your cards with us! We would love to see them.